

How to Turn a Ram ProMaster into a Campervan
Updated March 2025
Disclaimer: This post may contain affiliate links. This means I may receive a small commission at no extra cost to you. The reviews of the items in this article are based on my own opinions. Disclosure policy https://www.adoptinglifesjourney.com/blog/disclosure-policy
Turning a RamPromaster into a campervan
Well, I did a thing. I am joining the Campervan community. No, we are not selling everything and living full time in our campervan, but we will enjoy many trips as we explore the United States. When we lived in Iowa, we had a travel trailer, and we have many fond memories of camping. Even now, anytime we smell a campfire burning we long for the days of the past when life was calm, evenings were peaceful, and life was at our own pace. We didn’t go too far from home in our travel trailer but the campgrounds we did go to have left us with some great memories.
SAVE THIS POST FOR LATER, TO REFERENCE BACK TO AS YOU CONVERT YOUR VAN INTO A CAMPER.
**This is a long post as there is a lot of information to cover on converting a commercial van into a campervan! This van was completed between March - May 2020, prices may have changed since that time*
The idea of a camper van
As I was scrolling Pinterest one day, I started seeing posts of people turning commercial vans into campers and I became intrigued. I started pinning posts on my Pinterest board to save for later (follow my Pinterest account to see updated campervan and travel ideas). My research began and I became excited but overwhelmed with all of the options. I began to research different styles of van designs that would be best for my family. I then began my research for a van that we could convert into our own camper.
In this blog post you will find details on turning a commercial van into a camper. I have done a lot of research to find what works best for us. What will be different is there are not as many families who convert a van into a camper for a family of 6, but I was determined to do it. I used other blogs and YouTube as a guide. I have no experience in this sort of thing so had to just figure it out as I went. I will break down the cost and materials used for your reference. If you still have questions, you can leave a question in the comment section at the end of this post or do your own research to determine what materials would work best for you.
CHECK OUT THIS BLOG POST ON HOW TO FIND A VAN TO CONVERT TO A CAMPER
Ram ProMaster
First, let’s start with the van. We purchased a 2017 Ram ProMaster high top 3500. I did a lot of research on which type of van to buy. I knew after reading several blogs that I didn’t want a Mercedes Sprinter due to the limited mechanics who work on foreign vehicles and the parts tend to be more expensive. My other option was a Ford Transit. Although I liked this option, I liked the Ram ProMaster more. I wasn’t able to find a Ford Transit with a high top in my price range at the time of my search, but I did find a Ram ProMaster instead that had the high top and the right length with a 159-inch wheel base. I am happy with the Ram and love how well it drives, and we haven’t had any major concerns. I would definitely buy a Ram ProMaster again if I had a choice.
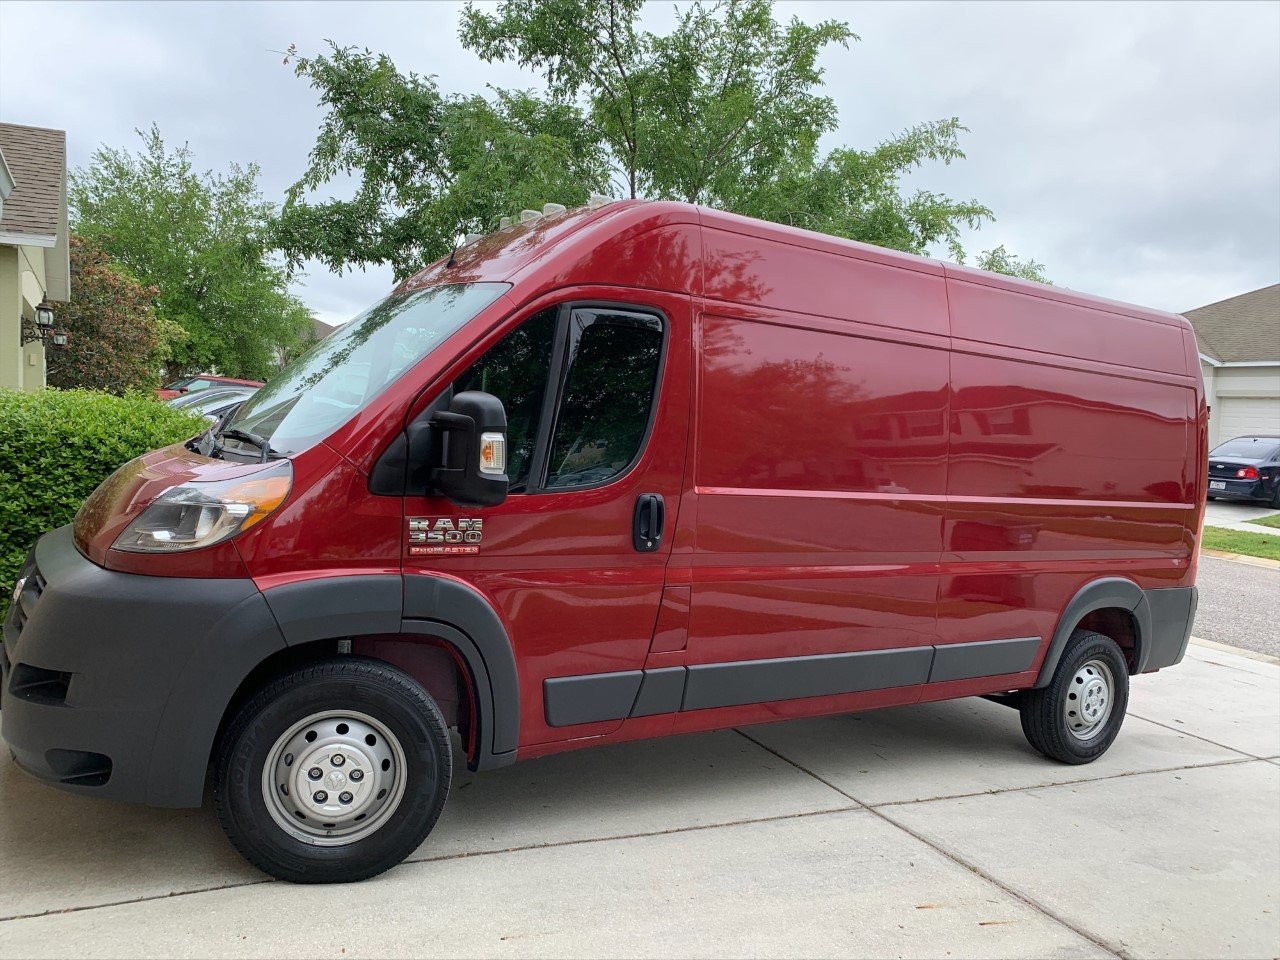
Here is the van we chose. Her name is Rosie. I just love her :-)
She was an empty shell when we purchased her which made it easier to convert into a camper.
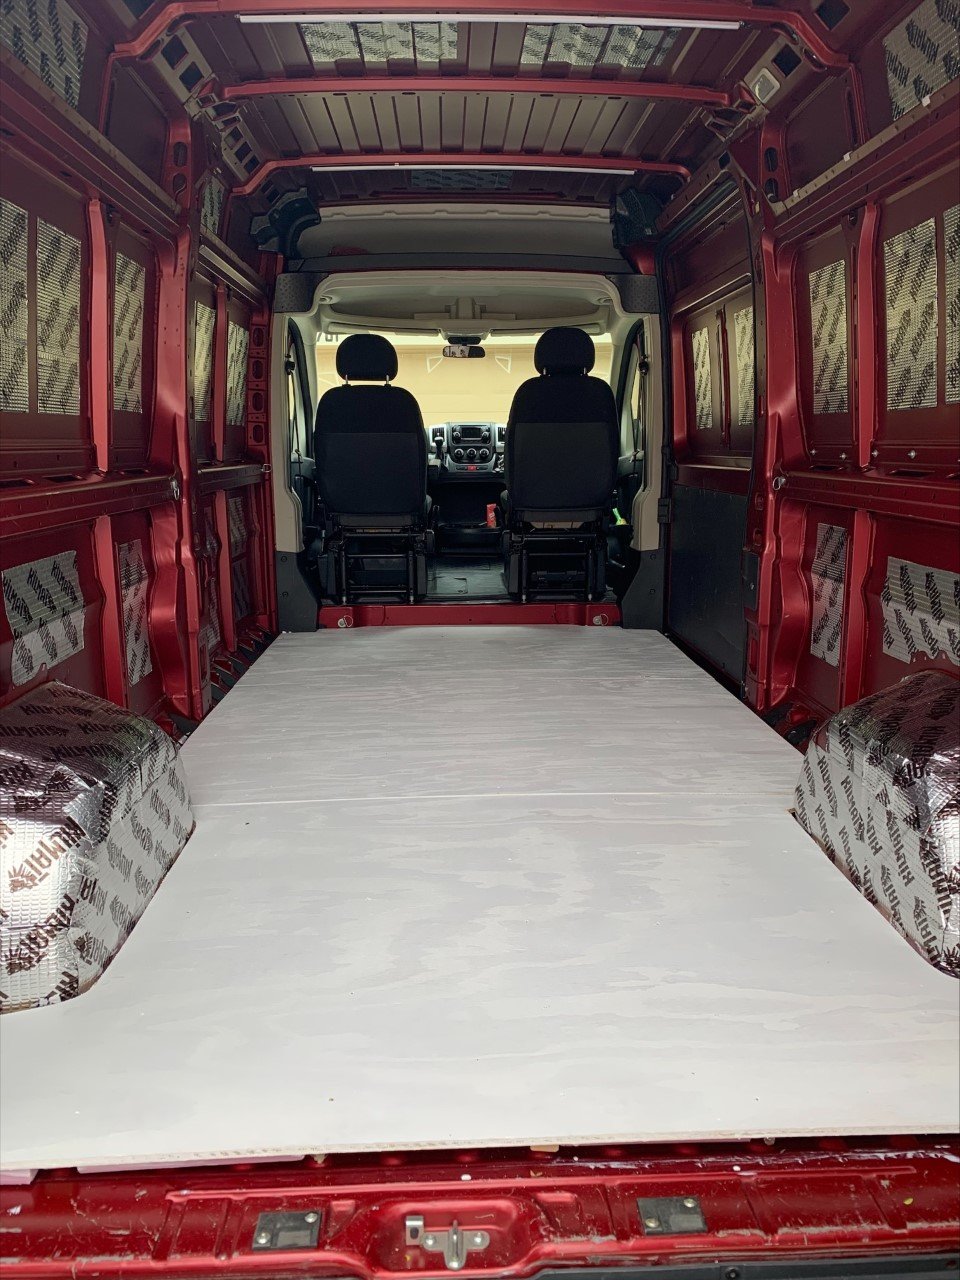
Campervan floors
I started with the floors as I transformed the van into a camper. I researched the types of insulation to use on the floors. I would use Pinterest (check out my Pinterest camping board here) to research blogs and then I made a list of the most used van floor insulation materials and picked from that list on what products I wanted in my van.
What I used:
I used 1” thick Foamular for the floors only.
I took 1x2 boards and spaced them evenly along the floor and placed the Foamular in between the boards. I then added foil tape in between the boards and Foamular to help with insulation. I “glued” the 1x2 boards to the floor with Liquid Nails and then I placed plywood on top of the Foamular and screwed it down to the 1x2’s. I was lucky when I purchased the van that it had a foam mat on the floor. I removed this mat and used it as a guide to cut the plywood around the wheelbase.
Next, I painted the plywood with Kilz primer mold and mildew preventer as I had read several bloggers that said the wood could get moldy underneath the flooring. Since it would be hard to see if mold was growing under the flooring, I wanted to do what I could to help prevent that.
After the paint dried (follow instructions on the paint can to know how long to wait for it to dry before applying the vinyl planks), I then laid the Smartcore Woodform Oak vinyl planks on top.
I chose not to screw the floor to the base of the van. I wanted less holes in my van to prevent rust or bugs getting in the van. So far, I don’t feel any shifting of the van floor.
Update: after two years the vinyl floor planks have separated some and there are small gaps between each plank which collects dirt. If I had it to do over again, I would glue the vinyl floor planks down or nail them randomly to prevent them from moving. Overall, the vinyl flooring itself is in good condition after 4 years of use.

Foamular insulation cut and laid between the 1x2 wood strips (1×2 wood strips used to screw the plywood floor into). I used liquid nails to hold the wood strips to the metal floor. Foil tape (not shown) was used on both sides of the 1×2 board and taped to the insulation.
The painted plywood with Kilz Mildew resistant primer was then screwed on top of the 1×2 wood strips.
Van floor cost
Below is the breakdown of the cost for the van floors. I knew I wanted durable and waterproof flooring, so I spent a little more to get a good quality vinyl floor.


1 inch Foamular R-5 for the van floors.
Floor supplies shopping list
wood screws 1x6
plywood
1x2 boards

Smartcore Woodford Oak Vinyl Plank flooring used for the van floors. Isn’t it beautiful :-)

Finished flooring is absolutely beautiful!
Van walls
Next is the van walls. First, I had read several other blogs that stated they used Kilmat on the walls to reduce road noise as they travelled so I decided to add it to my walls before I put up the insulation. This was an easy process as they were peel and stick and as you can see, I didn’t go crazy with this product, but some people add this product to fill the entire wall. I only did it sporadically. Your choice. The amount you see in the picture is one box which covers 50 square feet. Again, you can order more if you want to cover more of the walls and ceiling. I felt the insulation would also provide a sound barrier which it did.

Van wool insulation
Next, I researched insulation for the walls and came up with my favorite being Havelock wool (I ordered one big bag 200 square foot x1). Because so many people were starting to convert vans into campers they were giving me a delivery date of 6-8 weeks. I knew I only had a couple months to complete the build so I went ahead and ordered some of the Havelock Wool and then ordered some 3M Thinsulate Thermal insulation so I could quickly get the van sides insulated halfway and install the bed and then I could have someone complete the electrical work for me which was also a 4 week wait.
The electrical people required some of the walls to be up so they would have something to attach the electrical box to. If I didn’t have a deadline for traveling and electrical work, I would have only ordered the Havelock wool.

3M Thinsulate Thermal insulation I ordered a 30’ x 60’’ piece for the bottom of the walls.
Vertical wood strips
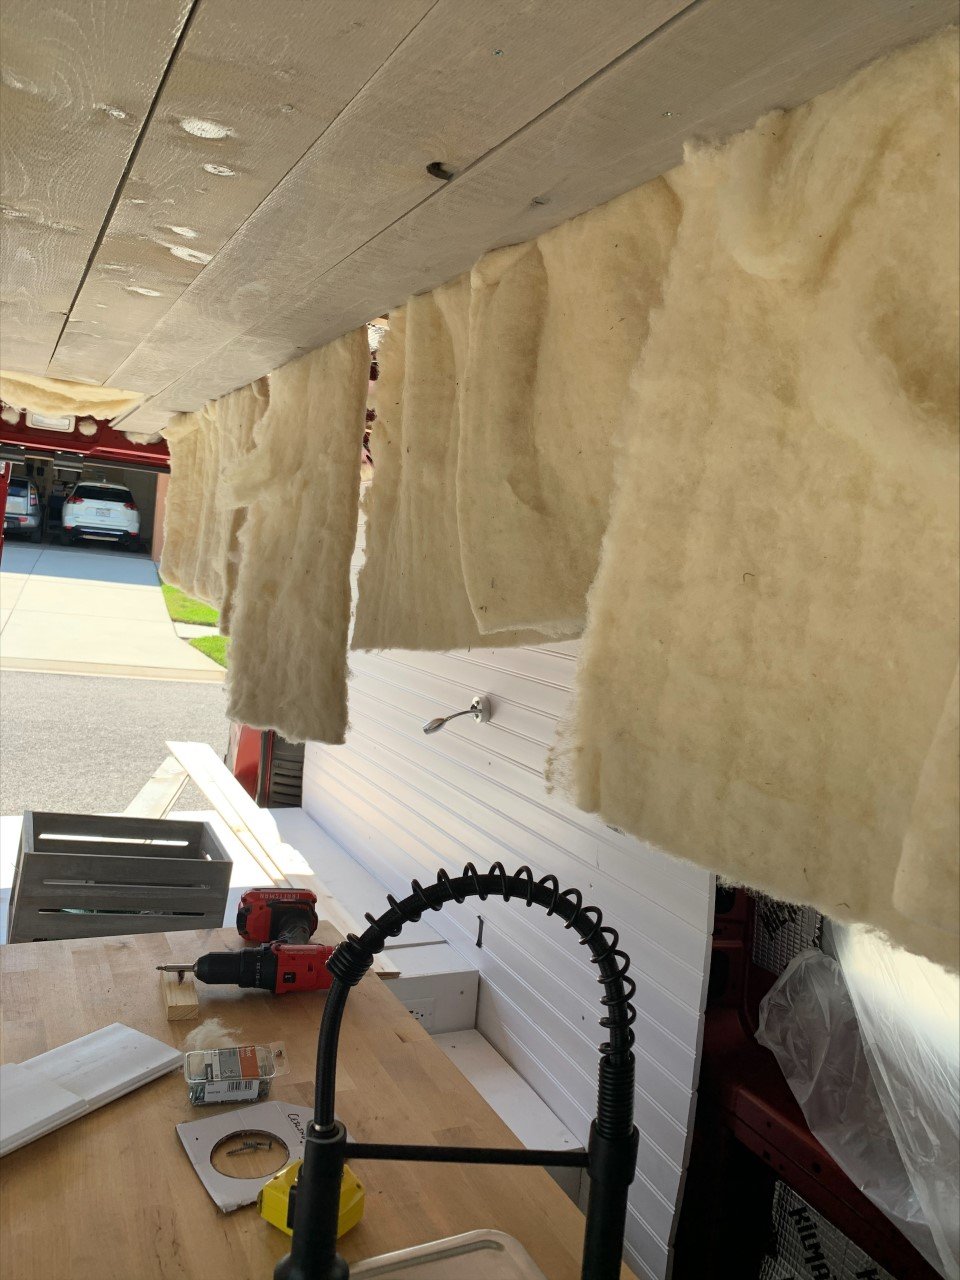
Before I could add the shiplap walls, I had to put wood strips going vertical and screw them into the metal frame of the van so I would have a place to screw my shiplap walls into. This was very difficult for us to do as we did not have the right tool. We kept pushing through with a simple drill and eventually were able to screw into the metal frame. Once we had the vertical strips up, I could then begin to screw the shiplap walls up and add insulation in between the shiplap and metal frame.
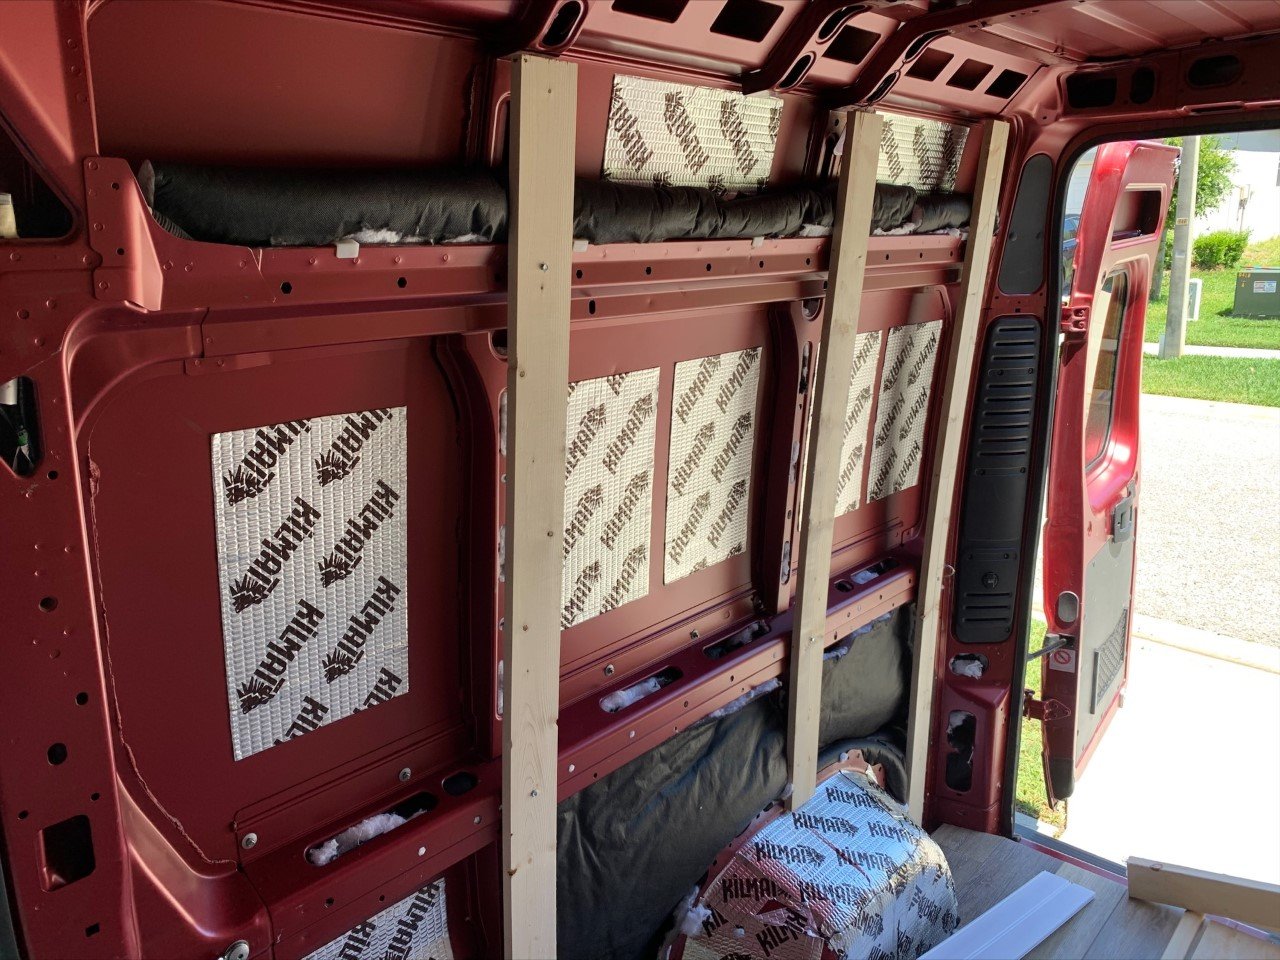
I stuffed some of the 3M insulation in the holes throughout the van. Any hole or space in the van was getting stuffed with insulation.
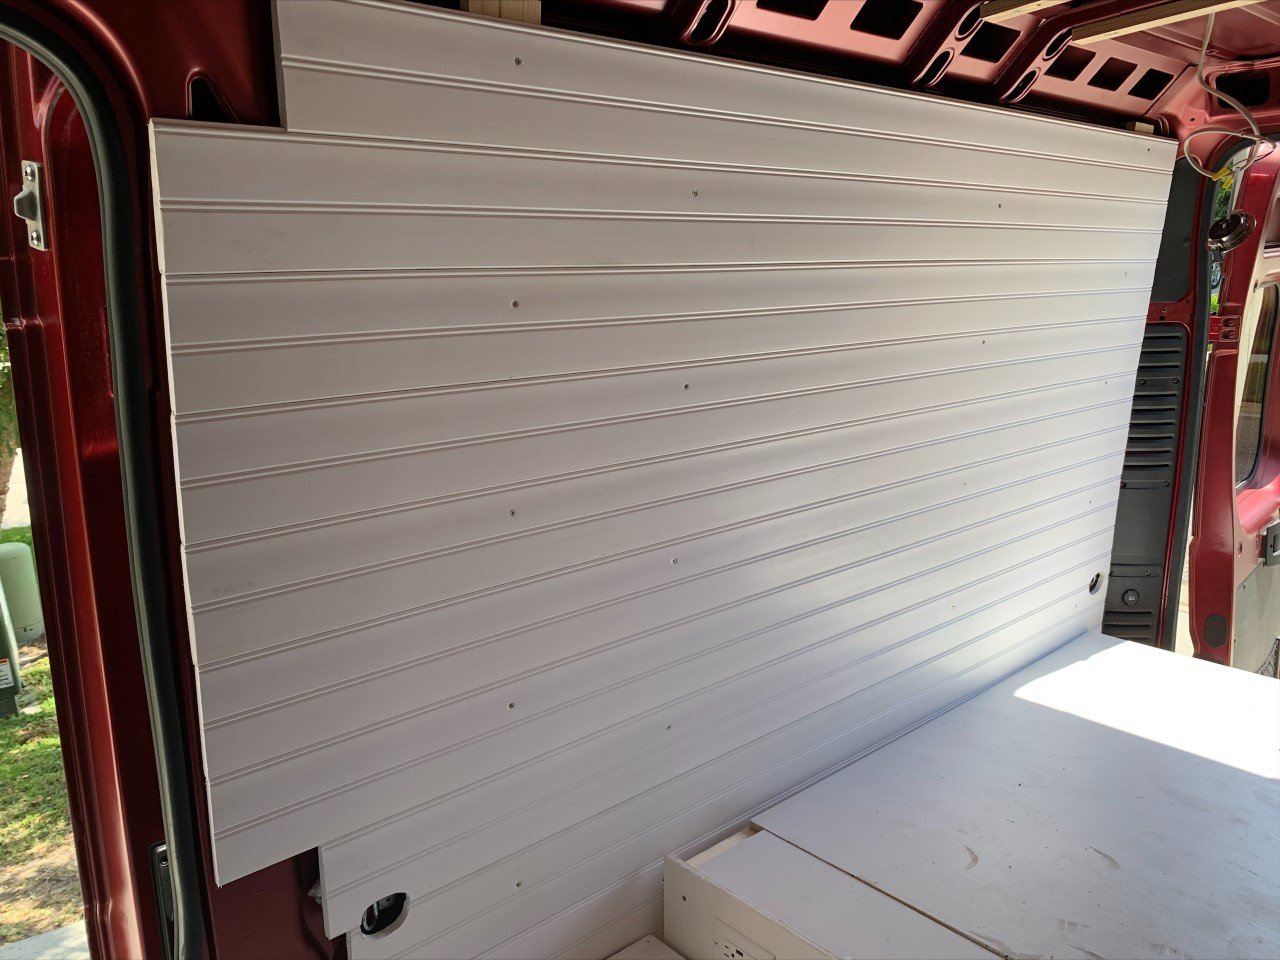
Shiplap walls
Next, I added white shiplap horizontally to the walls and started building the full-size bed in the back. I did purchase Poly Pro thin rope to help hold in the insulation as some people suggested, but I wouldn’t use it next time as it did not hold the insulation up well at all. You can just shove the insulation into the walls between the shiplap and metal frame as you put up the walls. Your choice.
Update: the white shiplap walls have held up nicely. They have a slick finish, so I use a magic eraser to wipe away any scuffs or marks.
Above, you can see the white shiplap walls going up and the wood frame for the bed. I chose to buy shiplap that was already painted white. It definitely costs more but for me it was worth the cost to eliminate the time I would spend painting it, letting it dry and then putting it up.
This is one side of the van (non-electrical side). The walls went all the way up to the ceiling and by this time I had the Havelock wool, so it was also added behind the walls.
Next was the opposite side of the van (below). This is the side where they put the electrical wiring up for the lights and outlets. (You can see the Havelock wool peeking out) I love that stuff!

Van walls and insulation cost
Below is the breakdown of what the van walls cost including the insulation and supplies.

Van walls shopping list
white shiplap
1x4 wood, 1x2x8
1 -1/2 inch, 2 inch, 2 1/2 inch screws
Beds, Benches and Cupboards
Next, I will talk about the beds, benches, and cupboards we built. This is pretty detailed, and I know this blog post is long so feel free to save this and come back after you go to the bathroom, get a drink and pen and paper to take more notes :-)
Van bed frame
Below is the frame for the full-sized bed. I knew I wanted the bed to extend the full width of the van and chose full size since we have 6 people that need to fit in this space. If we didn’t need as much space, I would have gone with the queen-sized bed. I ordered the 6-inch foam mattress, and I am very pleased with the product. We have used it for 4 years now and it continues to be comfortable.
I also added a way to help prevent mold under our mattress by adding Hypervent modular garden squares. (no pictures of it but I ordered 1 package of 16 squares) I have read stories about people finding mold under their mattress in their campervan due to the moisture being trapped in a small space. I did not want this, so I added this extra expense for protection.
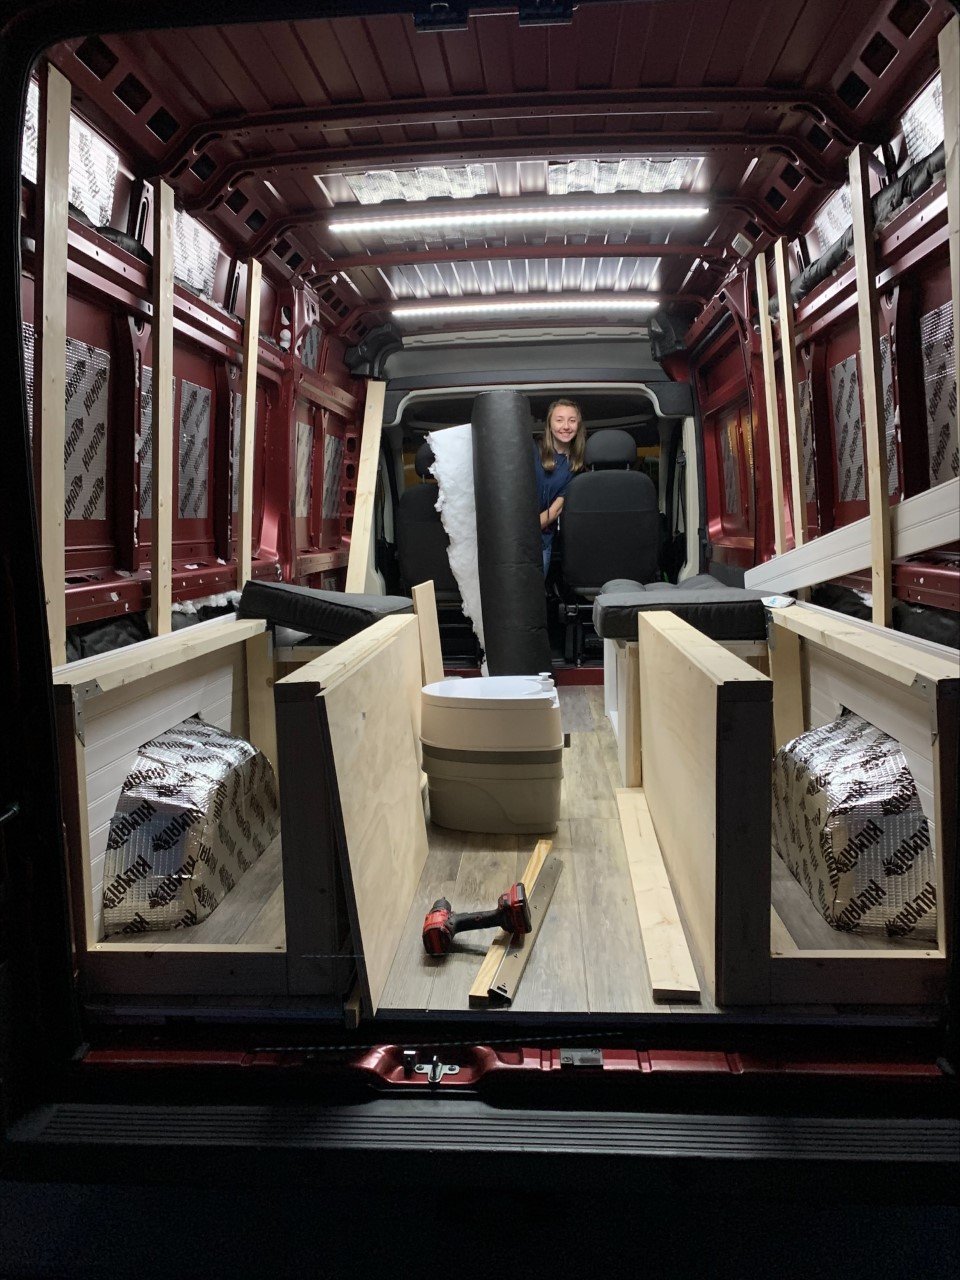
Bed construction
Here is another view of the bed construction and you can see the wall I built to divide the sliding table and toilet area. I also added metal anglers in each corner of the bed for additional support. I am so glad I did because our bed is really sturdy.
Update: I am of average height and when I lay in the bed, my feet touch the wall, and I have to lay with my feet flexed or to the side.
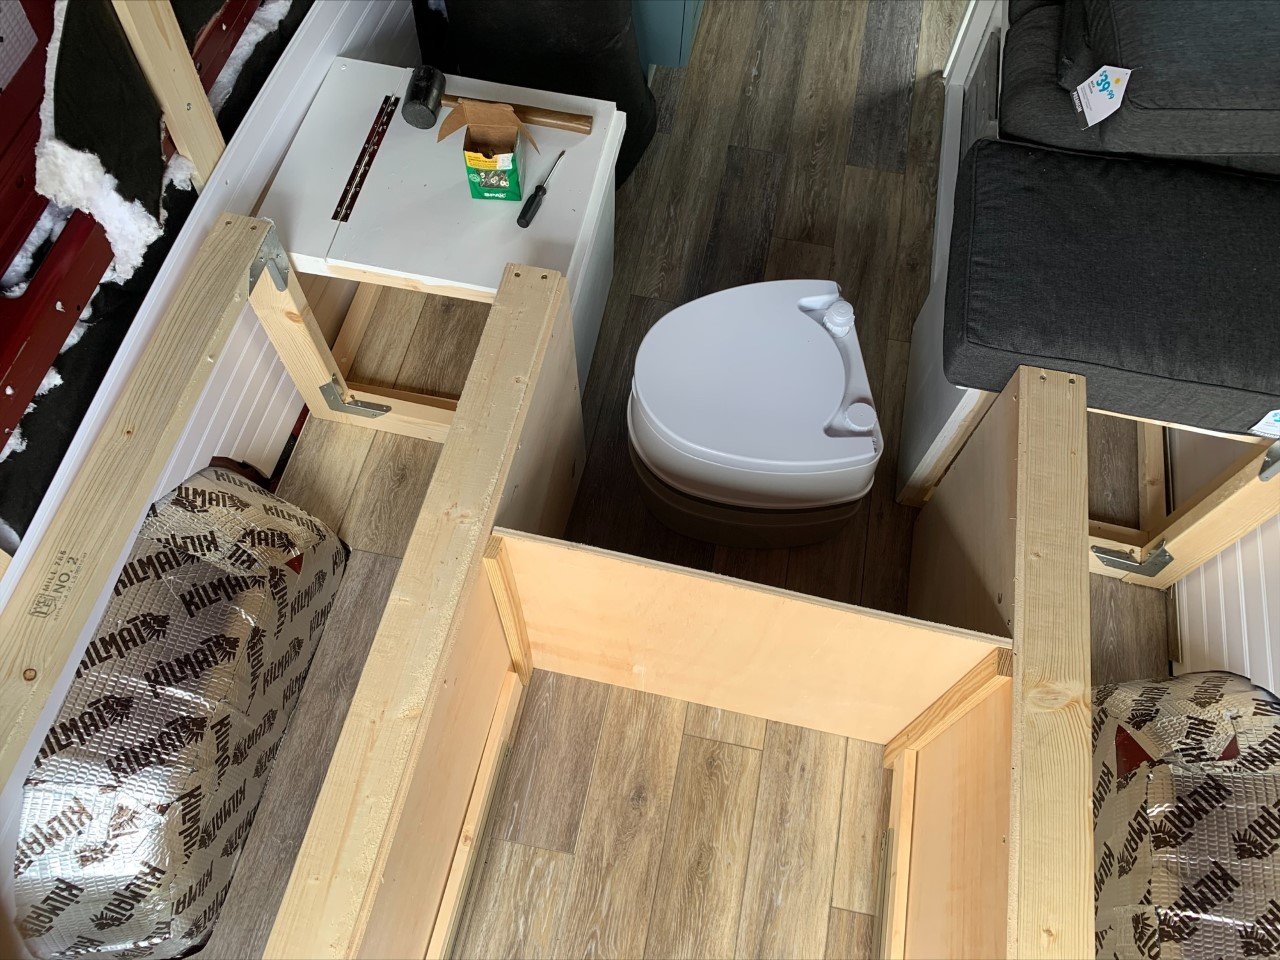
Below is the bed with the plywood on top also painted with mildew resistant paint. I added a door under the bed where we store the toilet. We have not used the toilet yet as we always use the restroom each time we stop for gas or groceries. I wanted the toilet for emergencies and so far, we have not had to use it.
Update: the small door where the toilet is located has warped some so make sure you use good wood, so it does not warp. Also, I had to cut out an opening in the bottom of the door so it would open when the added table bottom was put in the floor. See pic of table below of the table.
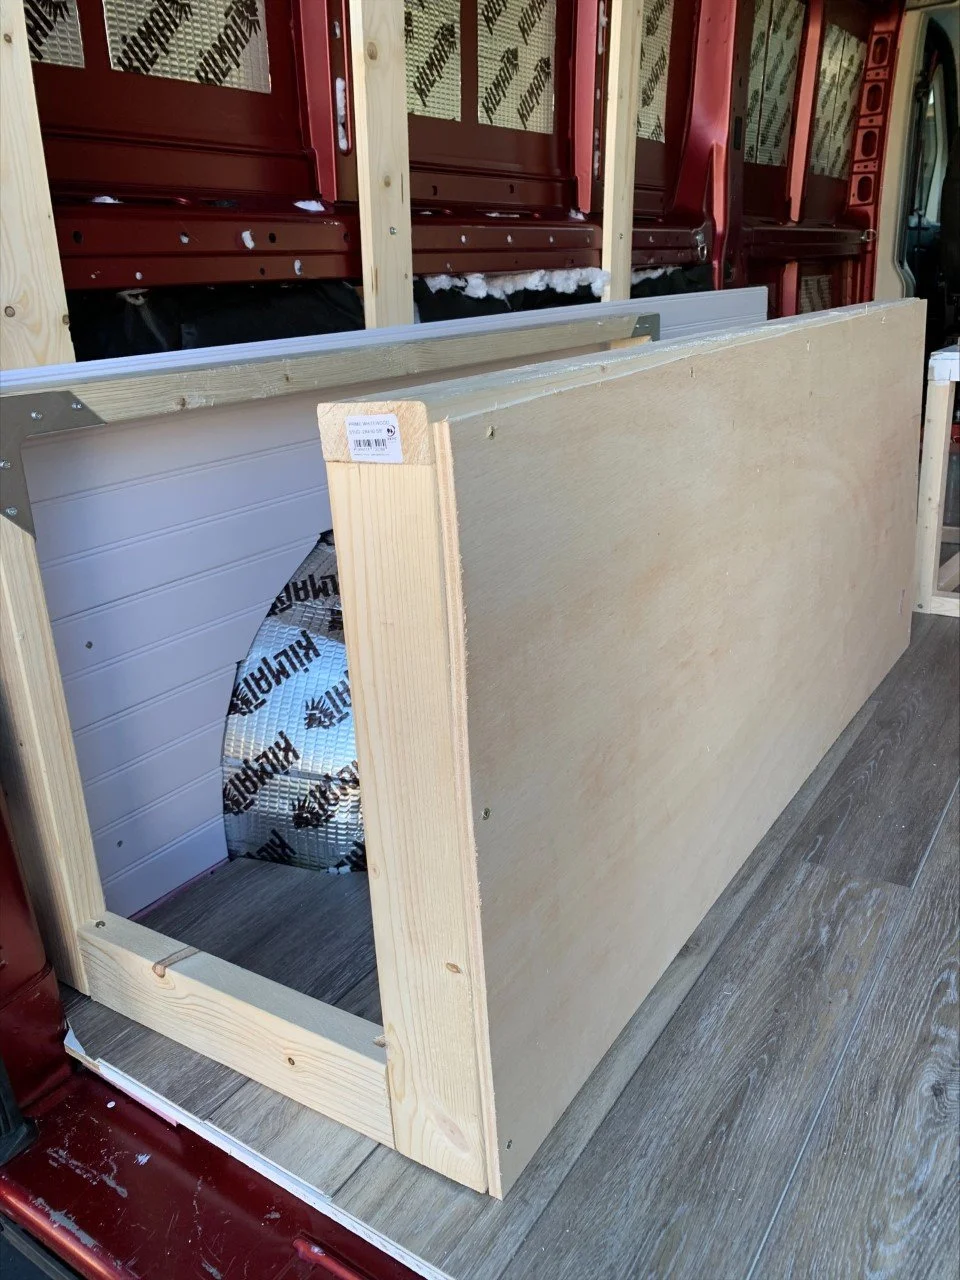
Van storage under bed
I needed storage space under the bed, so I made three sections below. The far left is where we keep the electrical components. The far right is where I store the life jackets, inner tubes, laundry soap, hammock, canopy and more. That space is always full, and I wish there was more room for all of our extra things.
In the middle I created a pull-out shelf/table. I anticipated using this table when we camped to cook meals on with our camp stove or to eat off of. We do not use it for those reasons as we need the extra storage for our inflatablekayaks and SUP’s and occasionally, I store our WENgenerator there if I do not bring the cargo trailer. I continue to play with this storage area as I travel.
On the other side of the slide out table is a wall I built (see pic below) where we store our Camco portable toilet.
I did not screw the bed to the floor, and it feels really sturdy, and I don’t feel that it is needed.
Update: the bed is still really sturdy and not screwing it into the floor has not caused any shifting of the bed. Also, we still have not used the pull-out shelf as a table due to the number of items we bring with us, so I am not sure I would create this pull-out self again. You can purchase a small cargo carrier to attach to your hitch where you could store some of those larger items and then you would have room to pull out the shelf and use it for a table.

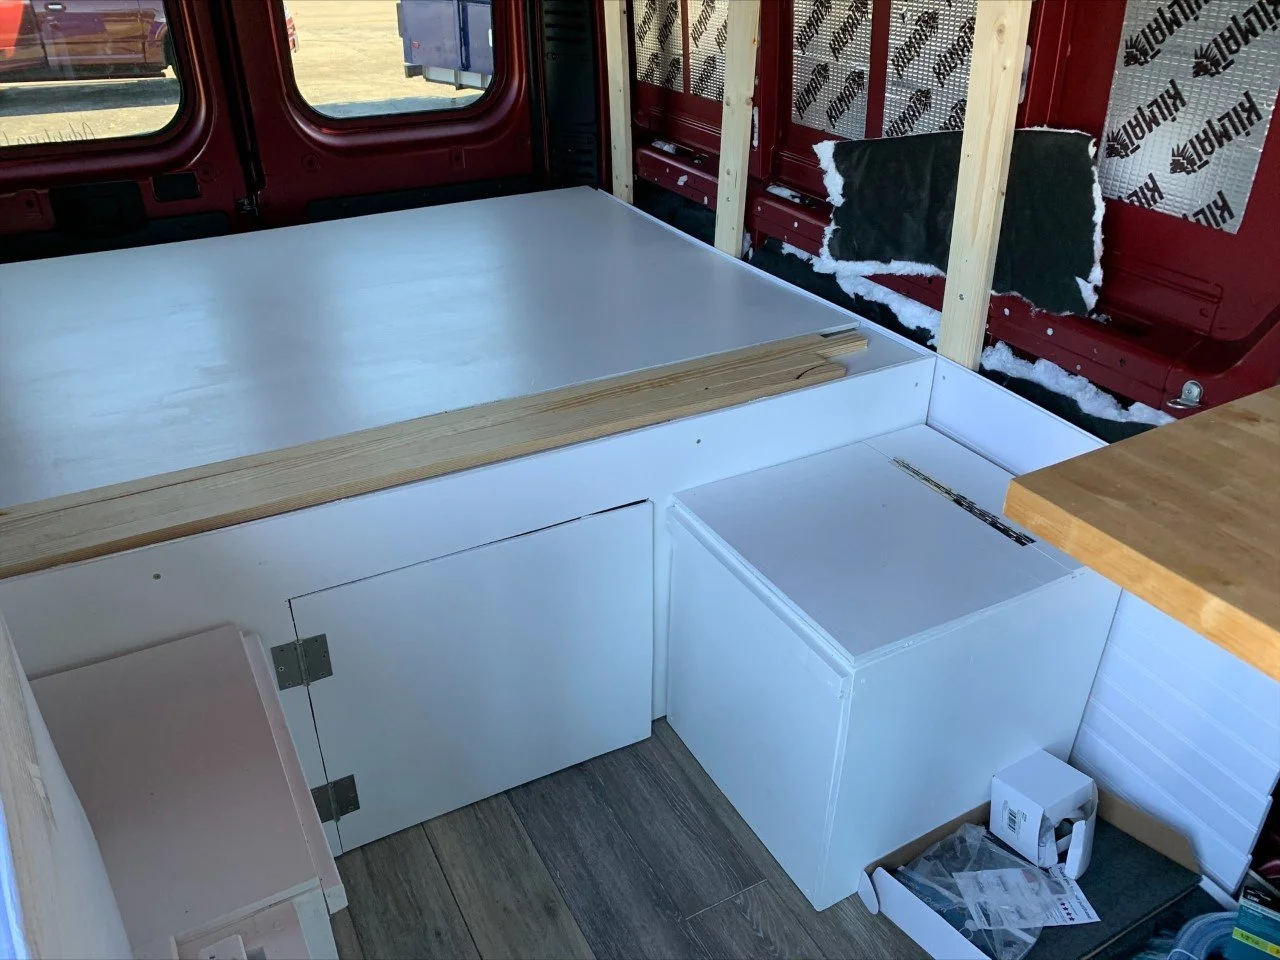
Side bench build
Side benches
Above is a picture of the two side benches we built. The small one on the right is a small square and will be next to the fridge. This smaller bench will have a lid that opens to store clothes in.
There will be a bench on the opposite side as well. This bench with the small slats you can see in the above picture will extend toward the front of the van to create a small bed.
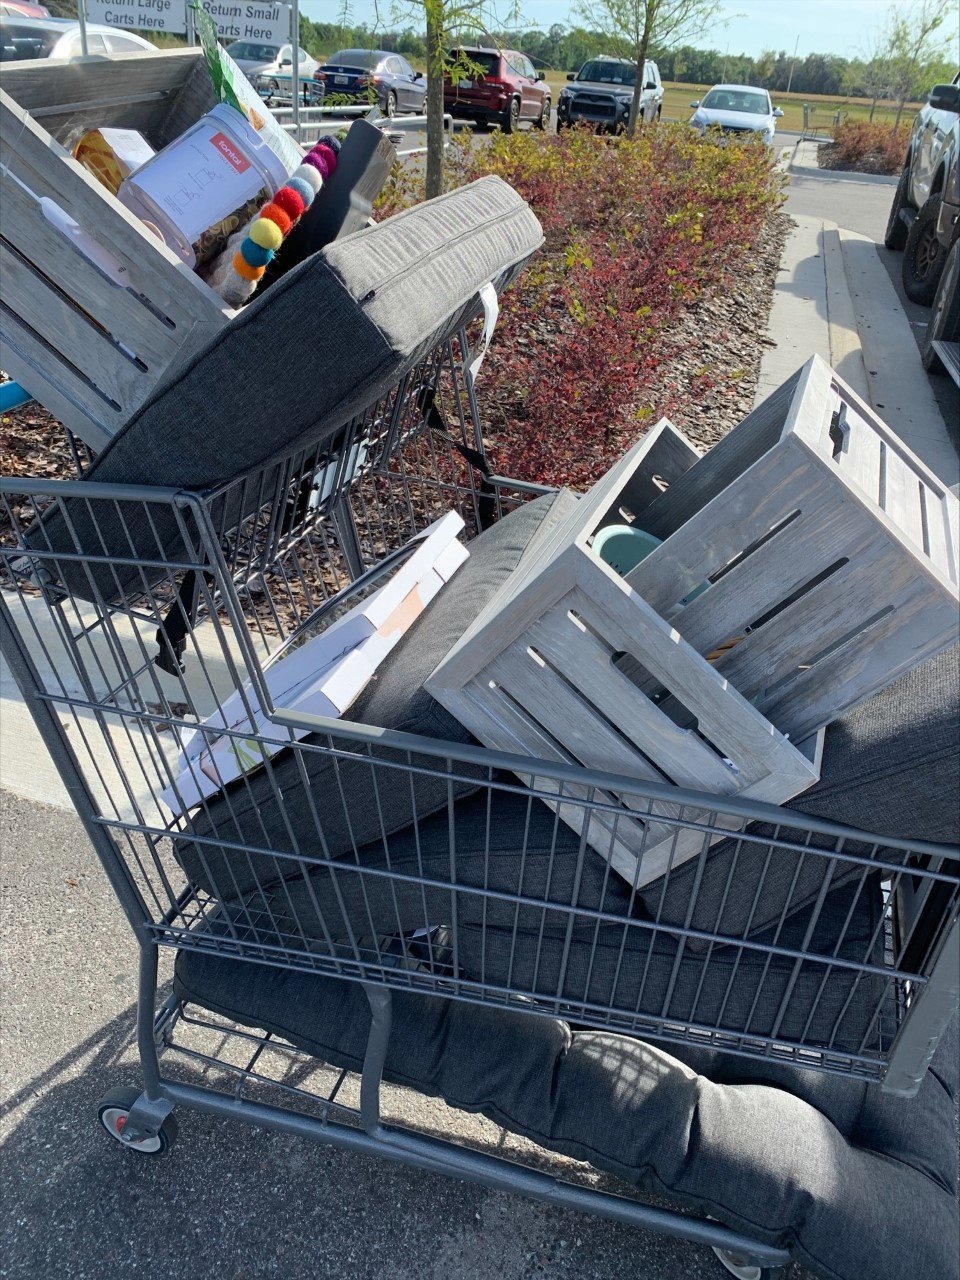
Underneath this expandable bench is our kitchen storage. In the picture below are the cushions and storage boxes for the above benches. These items were purchased at At Home. Those gray wooden boxes fit perfectly under the slatted bench.
Update: a couple of the wooden slates broke and had to be replaced as I use this bench to stand on to reach the storage area above the front seats. Also, the bench cushions are not the exact size of the benches and are thinner so next time I would have custom cushions made that are also thicker as my kids use the bench to sleep on. It is not the most comfortable place to sleep but we make do. We have also purchased a tent now that my kids are older and some of them sleep in the tent as while others sleep in the van.
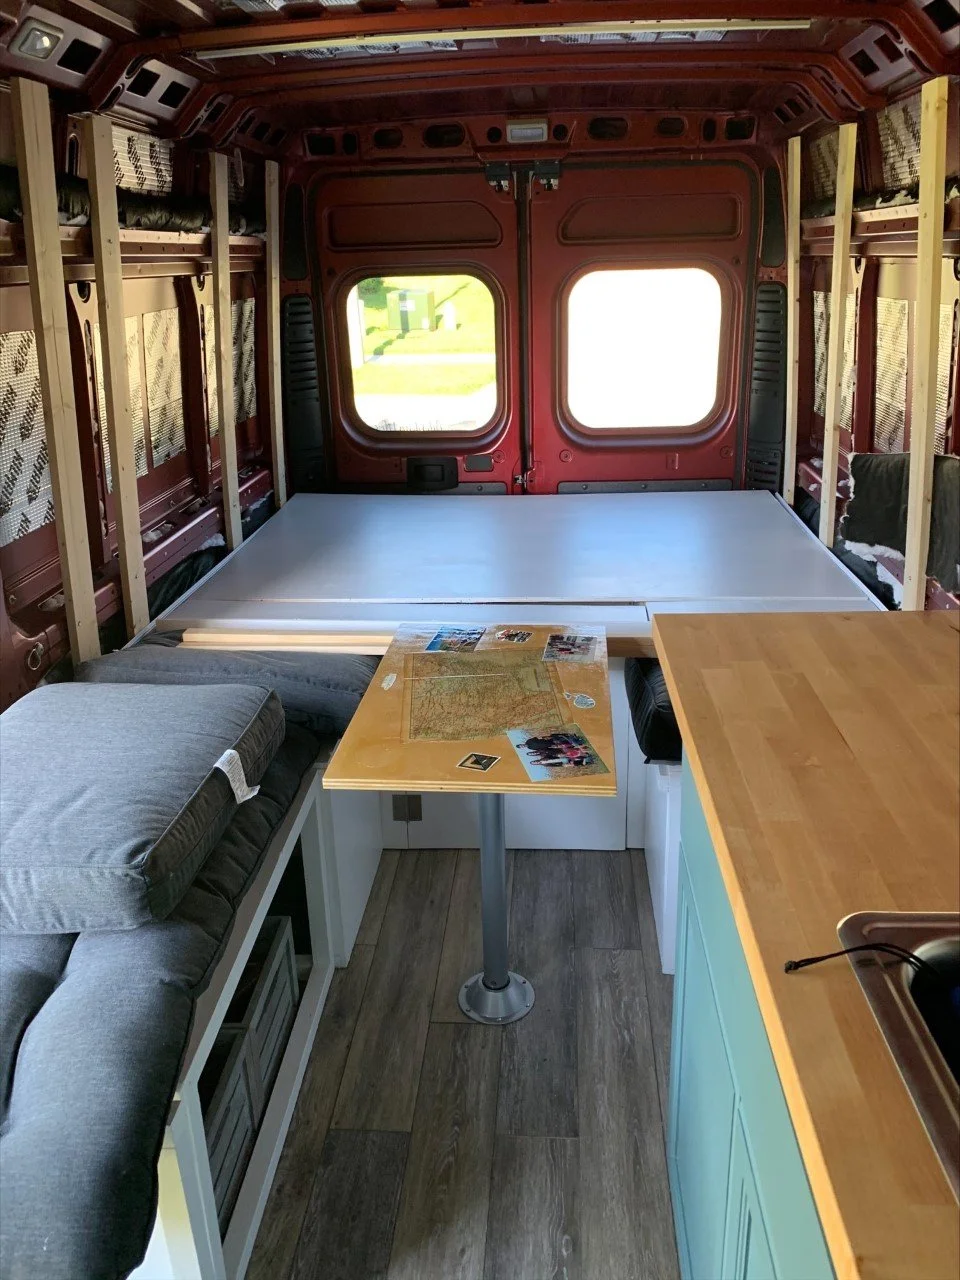
Small van table
Above is the table we built for inside the van. I purchased an old US map and added pictures of our family which I glued on to the table. I then added a couple coats of polyurethane on top to seal it.
UPDATE: The pictures ended up coming loose on the edges therefore this method did not work well, and I ended up removing the pictures, however, the map stayed attached and remains on the table.
I ordered an RV table leg which worked well although the space is really small.
UPDATE: We rarely use the table as the space is so small. We typically sit on the benches and hold our plates on our lap, or we eat outside the van. When we do use the table, it is when we can all sit around it and play a card game.
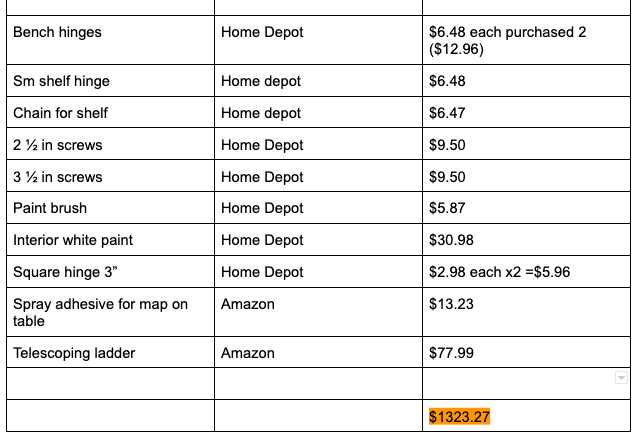
Bed/benches/table cost
Below is a breakdown of the cost for the bed, benches, table, and misc.


Telescoping ladder
The telescoping ladder in the above description we use to climb on top of the van if needed. This has been a great ladder so far and I highly recommend it. It is easy to expand and put back down with a push of the button. Remember that sliding shelf/table I talked about? I raised that shelf/table up just enough that the telescoping ladder fits underneath it perfectly for storage.
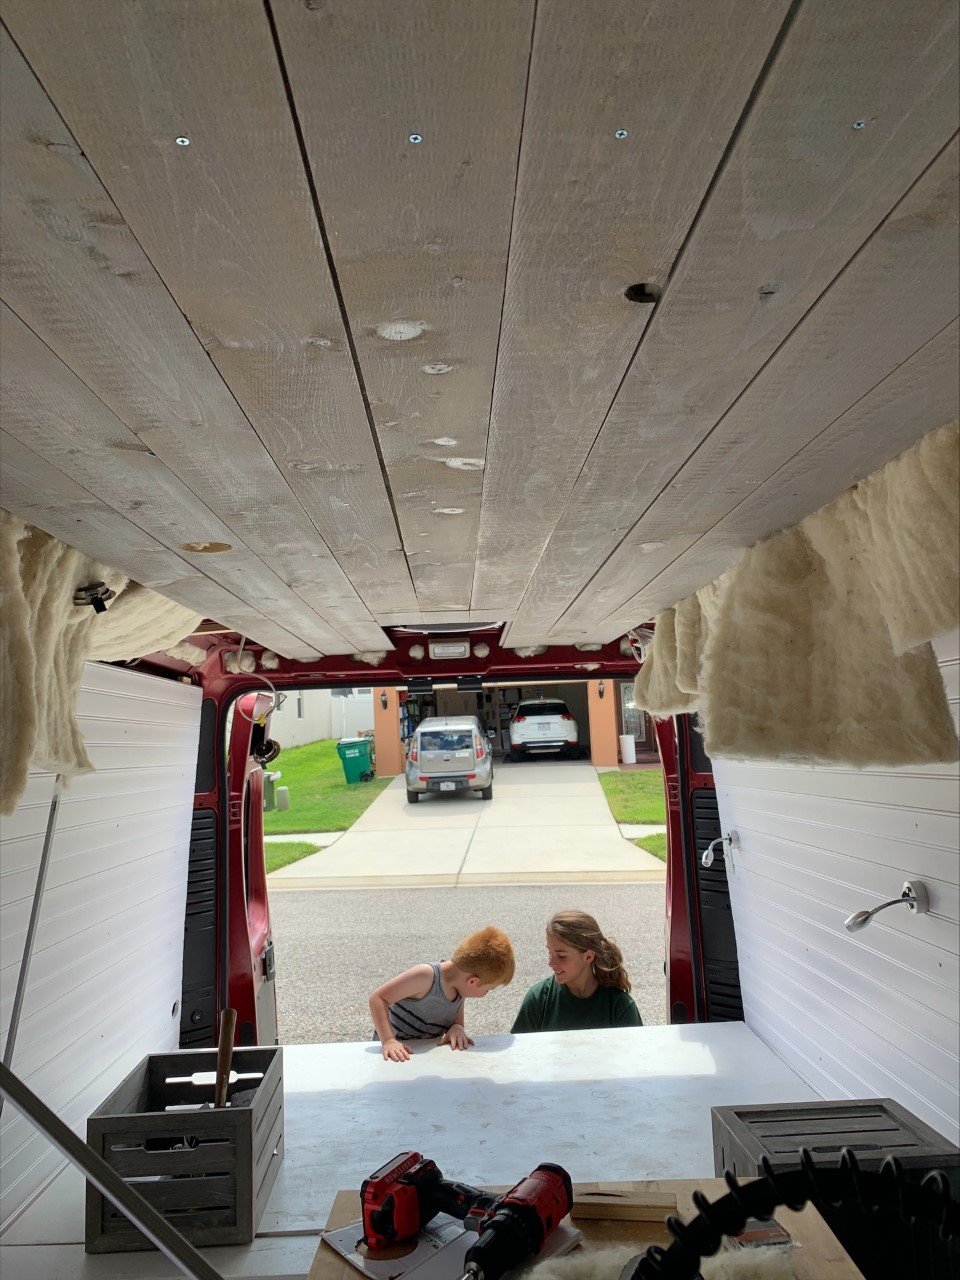
Van ceiling
Next is the ceiling in the van. I purchased a grayish toned board for the ceiling, and I love it! I also purchased a Maxx Air fan for the ceiling to provide a breeze at night. I did not purchase the one with a remote for fear of losing the remote with so many of us in the van and to save a little money. The mesh cover on the fan does need removed often to clean inside and get rid of the bugs. It is easy to remove and replace.
I added more 1x2 strips to the ceiling to screw the boards into.
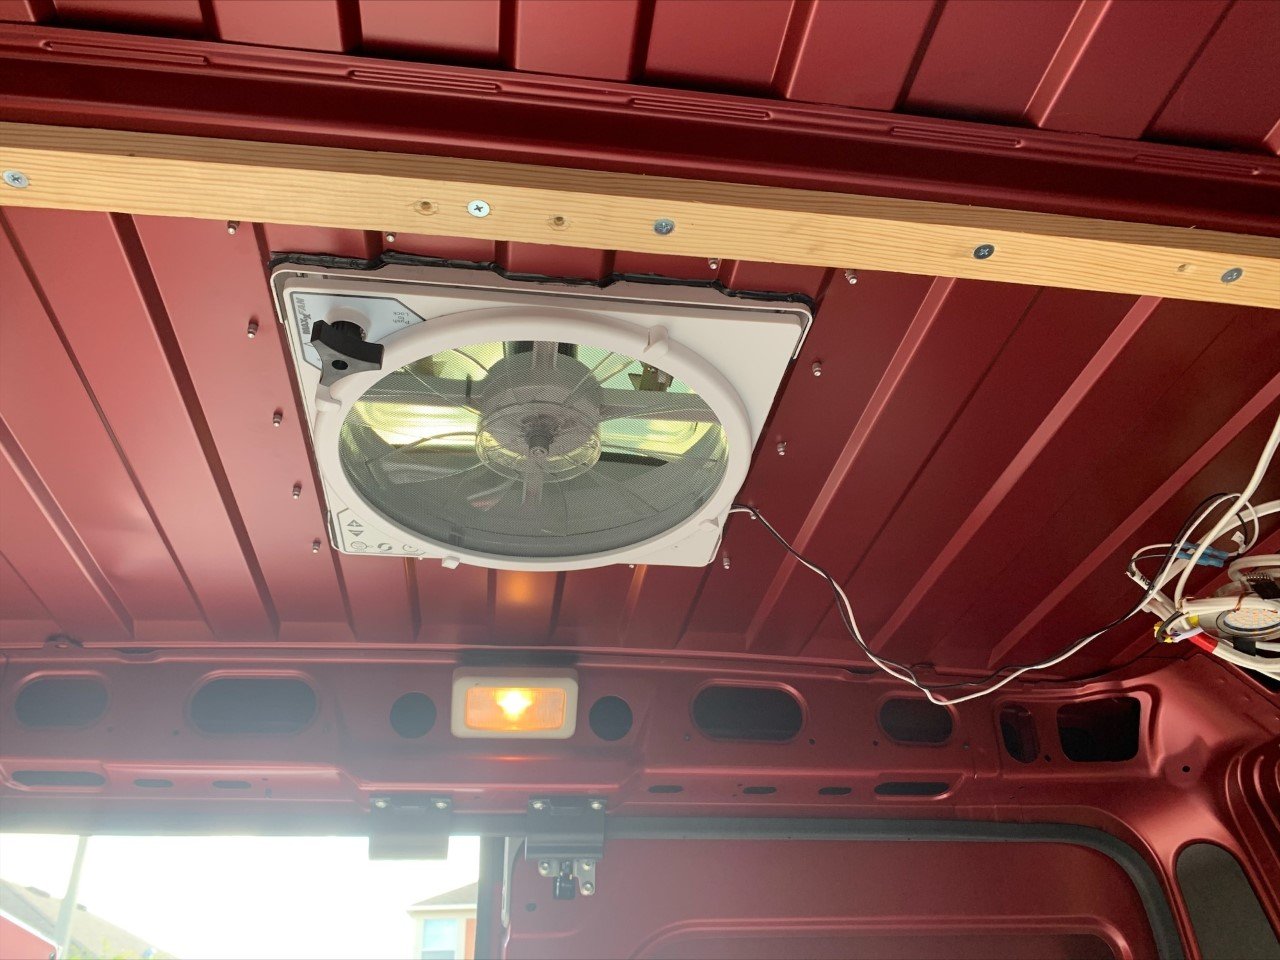
Again, I just shoved the Havelock wool up into the ceiling as I added boards to the ceiling.
Van ceiling cost
Here is the cost for the ceiling boards and MaxxAir fan.

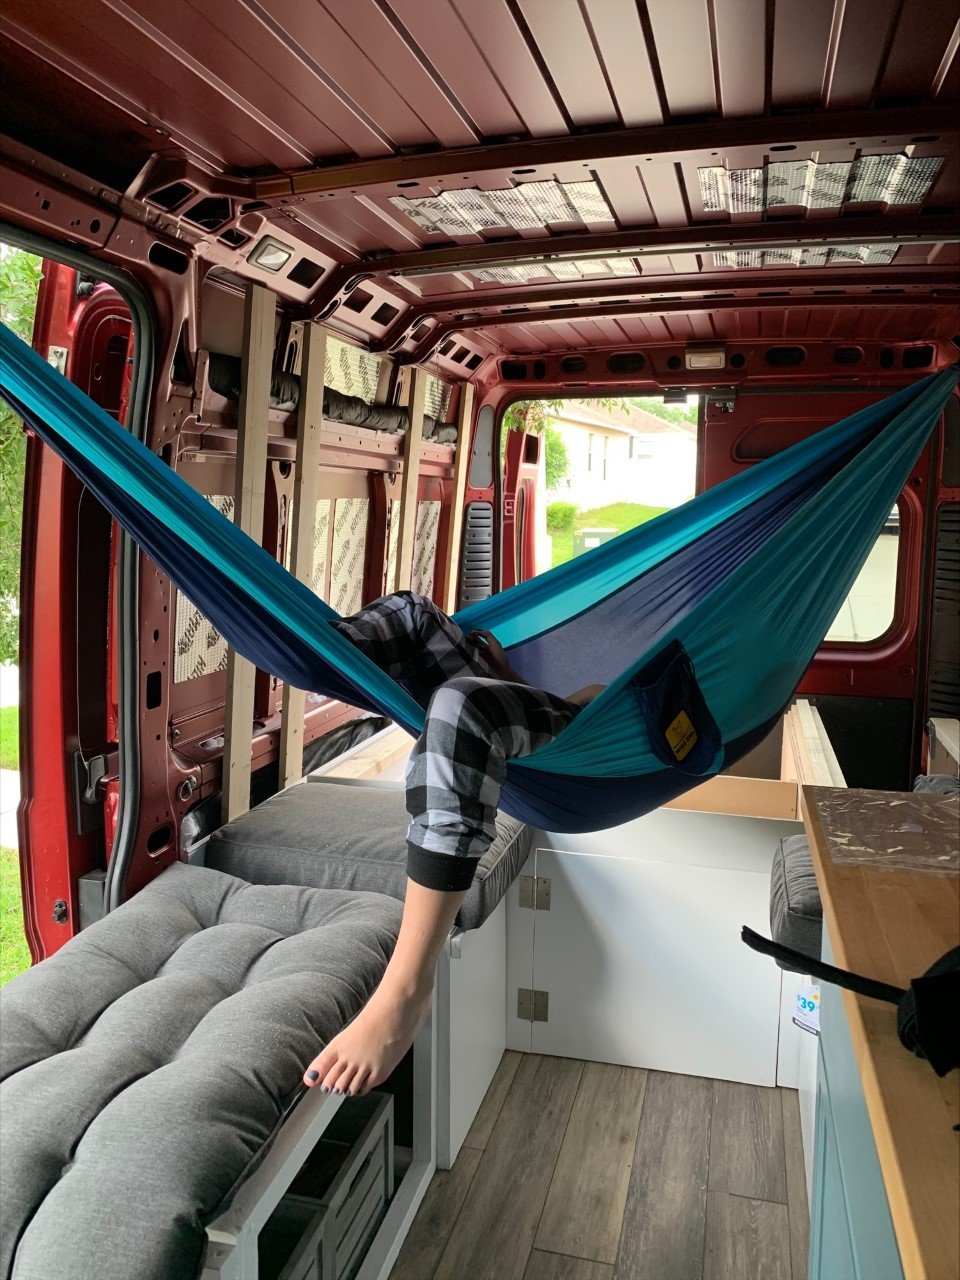
We kept a couple hooks in the van so we could add a hammock as needed. These hooks were already installed in the van to tie down equipment, so I just moved them around to where we needed them. My youngest son often sleeps in the hammock at night.
Van kitchen
Next section is our kitchen build. I purchased an in-stock cabinet and painted it a blueish/green color and added an in-stock butcher block countertop. The butcher block I purchased isn’t long enough to fit fully over the cabinet and fridge, so I built a box to fill the end space. If you have a saw capable of cutting the thick butcher block you might want to purchase a larger piece, so it extends the entire length of the cabinet and fridge. You will then need a small piece of wood under the end, above the fridge, so it doesn’t bend without the additional support.


I added cutting board oil to the countertop, but it definitely needs more than that to protect it. It has a few stains on it now, so I need to come up with a new plan. Maybe polyurethane it also??
Kitchen sink
I installed a sink and faucet (similar faucet if that one is unavailable) in the cabinet that we use for everyday use. I went with a small bar sink since the space is so small. It has worked out just fine for us. We had to cut a hole in the butcher block to fit the sink. A template comes with the sink, so you know what size to cut the hole.

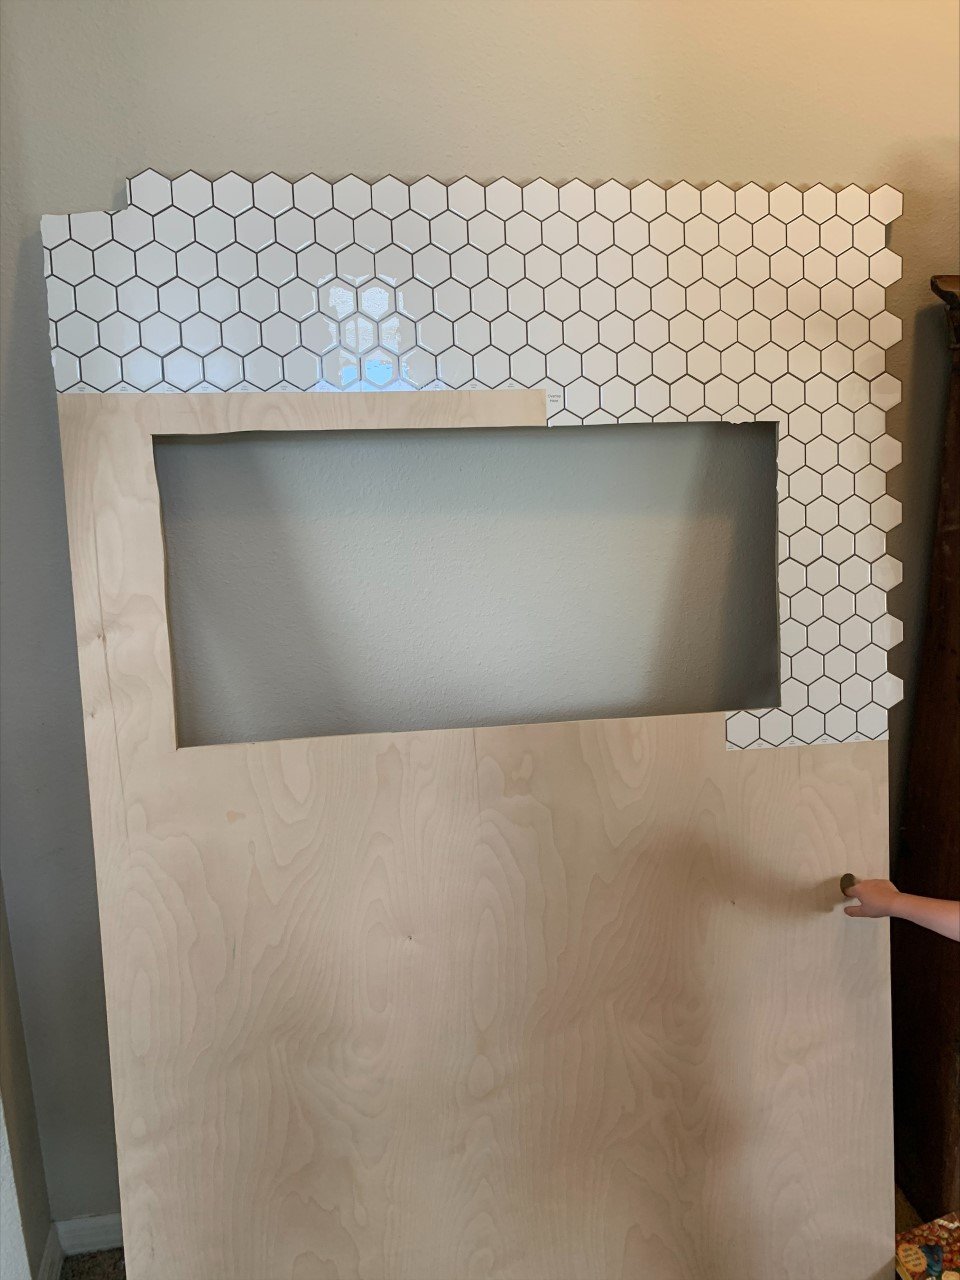
Kitchen backsplash
For the wall behind the kitchen sink, I purchased peel and stick tile to complete this project. I have used peel and stick tile before and had good luck with it. I promise it will look good once you see it all put together.
We had our electrical guys add a window (which is why there is a rectangular square in the below pic) to the side of the van to have a breeze at night. I love the window and would love to put one on the large van door also to have more airflow between the two.
Update: the peel and stick tiles are still up and have not peeled away from the wall at all.

See, all put together the tile looks really nice!
Kitchen cost


Kitchen accessories
We use this Hanging basket for our fruit which I love. I would order two of them next time so I can put vegetables in the other one. I used Velcro to hold that small fake plant in the window so it wouldn’t move when we traveled. I also added Velcro under the pink/white crock above that holds our plastic silverware.
Update: The Velcro has held well and the pots both stay put as we travel.

I am still looking for the perfect bedspread for our bed that doesn’t cost a lot. The fridge is full of stickers that I have collected from @rvstickerclub on Instagram

This is the bin we built to store cutting boards, plates, utensils, potholders and more. The butcher block countertop did not extend completely over the fridge, so I build this box to finish it off, see picture above this picture for more detail.
I am still adding finishing touches and rearranging things, but it is mostly done, and I am very happy with the final van build.
Miscellaneous costs


Miscellaneous shopping list

Tools purchased for the build
Other tools we used but already had
drill
hammer
jigsaw and miter saw
tape measure
pencil for marking boards before cutting
Box knife
rubber mallet
screwdriver
Other miscellaneous tools

Van decor cost

Electrical work
I did pay someone to add the electrical lights and outlets in our van. I didn’t want to risk a fire hazard since I have no experience in electricity, so I chose to have someone else do this. It did cost me around $5,000 which is a lot but so worth it!
They installed an outlet so we can plug into an outside outlet to charge our battery charger or plug into our generator. They installed the large battery that we charge to run our lights when we boondock. They installed several outlets, the lights on the walls and in the ceiling.
They also cut the hole and installed the window and installed the MaxxAir fan which was included in that price.

Hickory Hammock Equestrian Campground in Lorida, Florida
Related blog posts
Camping locations across the United States
We have traveled to many different boondocking locations in our van. One of those camping spots we have traveled too in our van was Hickory Hammock Equestrian Campground in Lorida, Florida. This campground is free to camp at once you register online (which was easy to do). Camping location includes a picnic table, fire pit, pit toilets, cold outdoor showers, dumpster, and horse barn is available. No electric sites that I saw. Check out more camping locations across the United States on this blog post A list of FREE camping locations across the US.
I hope this blog post was helpful
I hope that this list is helpful to you as you decide on whether a campervan build is right for you. I know that I have really enjoyed all of the trips we have taken in our van, and I cannot wait to take more trips across the United States.
Please feel free to reach out to me or comment below with any comments or questions. I am in love with my campervan, so I am happy to help or answer any questions you may have.
I can’t wait to hear about your journey. Follow me on Instagram for more trip details. DM if you follow my Instagram page and I will follow you back
Enjoy the journey,


Meet the author: Jennifer
I am a girl who loves to travel and enjoys sharing expert family travel advice. I am a content creator and influencer on Instagram with years of travel experience and provide readers with advice, tips, and details on adventurous family travel and tips on saving money while boondocking or traveling across the US.
Follow me on social media to discover more travel ideas
Instagram @adoptinglifesjourney
Pinterest /adoptinglifesjourney
If this post was helpful, follow me on Instagram @adoptinglifesjourney and
Hashtag your photos at #adoptinglifesjourney
Need help planning a vacation? I am also a travel agent. Follow me on social media and send me a DM @exploringsunsetstravel for more travel inspiration or for a FREE travel quote.
New blog posts


Nassau is a bustling cruise port and a popular destination when traveling in the Bahamas on shorter cruises from Florida. This port offers everything from mouthwatering local cuisine to stunning white-sand beaches and rich Bahamian heritage.