The Ultimate USA West Coast Road Trip Itinerary
Disclaimer: This post may contain affiliate links. This means I may receive a small commission at no extra cost to you. The reviews of the items in this article are based on my own opinions. Disclosure policy https://www.adoptinglifesjourney.com/blog/disclosure-policy
West Coast Road Trip Itinerary
I have planned the most epic road trip traveling across 5 states from Colorado to California with multiple stops along the way that include stunning landscapes, captivating coastlines, and picturesque deserts. You will get to visit 5 National Parks, multiple other scenic stops and enjoy an overnight stay in Las Vegas.
Planning a large trip takes a lot of time and planning. I try and pack as many adventures and scenic outlooks as I can into the short amount of time. This trip is a minimum of 13 days but can be spread over a longer period of time if desired. Fast travel may not be ideal for many, but this is what works best for our family. I have created this itinerary as a guidance for your next big trip.
Join me as we uncover the world of boondocking, secluded desert landscapes, and explore amidst this world’s natural beauty. This itinerary is easy to follow and will provide a basis for planning this trip for your family. Everything will be detailed so you will know exactly where to go and where to stay at each destination. This will be a fast-paced travel with little down time for those with limited time to travel but still want to see a lot.
Before you begin your travel, you will find the essential items that are needed to accomplish first, and tips along the way to make the most out of your adventure. I will include must see attractions to ensure you get the most fun out of this journey.
This list will NOT include any hotel stays except the one stay in Las Vegas. As you get into California, boondocking becomes scarce. You will have to be creative in finding places to camp for FREE. You can locate campgrounds to stay at with a little research but often times you will need to book those spots way in advance. Parts of this guide will require flexibility and/or planning ahead. If you need a hotel, check out booking.com or VRBO for cheap accomodations.
States you will visit with this tour include: Colorado, Utah, New Mexico, Nevada, California
**Please leave me a comment below if this was helpful or what else you would like to see on my next itinerary.
What is Dispersed camping
Undeveloped land with little to no amenities. Please pack out what you bring in and keep these areas clean so others can continue to enjoy them for years to come. Do NOT create a new camp site off the path as this will disrupt vegetation and cause damage to the existing lands. You are responsible for your own safety while wild camping.
Before you go
Purchase an America the Beautiful National Park Pass so you can get into each national park for free.
Purchase Pikes Peak tickets especially if you want to drive to the summit.
Make reservations for the T-Rex 4x4 Tours U-Drive Experience at Moab Tourism Center. This is an absolute favorite tour of ours!!
Get tickets to Arches National Park (April 1 to October 31 you are also required to have a timed ticket)
Book a Las Vegas Hotel stay. If you have kids, I recommend Mandalay Bay or MGM Grand Hotels as they have some amazing pools.
Purchase a Road Atlas in case you lose signal as you travel. We have had to use this a couple times and I was glad I had it.
Book a campsite along Big Sur in California early. See details below.
Print a map of Big Sur before you go as there is no signal along Highway 1.
Consider what you will do with any pets you have if they cannot hike the trails in the National Parks.
Cash needed:
$15 for Valley of Fire State Park
**This trip starts out in Colorado at Garden of the Gods and ends in San Francisco, California
Day 1 - Garden of the Gods
Start your morning at Garden of the Gods in Colorado Springs, Colorado. This park contains 480 acres of beautiful sandstone rock formations that will leave you in awe at their beauty. For details on the hikes within the park. Read more about visiting Garden of the Gods Park.
Visitor Center Hours: 9 am to 5 pm (Winter months), 9 am to 6 pm (Summer months). Restrooms are available along with food, map of the trails, and souvenirs such as books, clothes, toys, and more.
Park Hours: This park is open 5 am to 9 pm (November to April) and 5am to 10 pm (May to October).
This park is open every day of the year except Christmas, Thanksgiving and New Years day. No reservations are required to visit Garden of the Gods.
Things to do: hiking, rock climbing, horse back riding, electric and mountain bike tours, Segway tours ($92 per person), and junior rangers program.
Pets are allowed on the trails and in the visitor center (except the Café) but must be on a leash.
Drive to camping location: 45 minutes
Other things to do in the area
Day 1 Camping at Pike and San Isabel National Forest
Pike and San Isabel National Forests in Woodland Park, Colorado. This location was beautiful and the view of Pikes Peak from our camping location was spectacular (see picture below for view). What a view to see the snow-covered mountains in the background. This area is surrounded by forests and grasslands and consists of 3 million acres across Kansas and Colorado. There are also multiple locations within this forest for dispersed camping. There are significant washboard roads throughout this area so take it slow as you travel.
Cost: FREE. No reservations are required. There were several camping locations throughout this area. The area we chose to camp at had a lot of washboard areas and larger rocks to travel over. Doable in our 2WD Ram ProMaster but take it very slow.
Amenities: There are no amenities at this location. Fires were allowed. Shade trees throughout the area. It is likely you will not be alone as there were people camping everywhere. Pikes Peak view in the background makes this a popular camping location. You could camp in a tent at this location which a gorgeous view of the beautiful trees and mountains in the background.
APPS (where you can find this location): iOverlander (similar locations), FreeRoam (Cascade-Chipita Park) on same dirt area.
GPS: 38.96889, -105.00831. This is one location, there are several throughout this area.
Location to Pikes Peak: 17 minutes north of Pikes Peak.
Items we have found useful on our travels. Links are available for more information or to purchase.
Day 2 - Pikes Peak
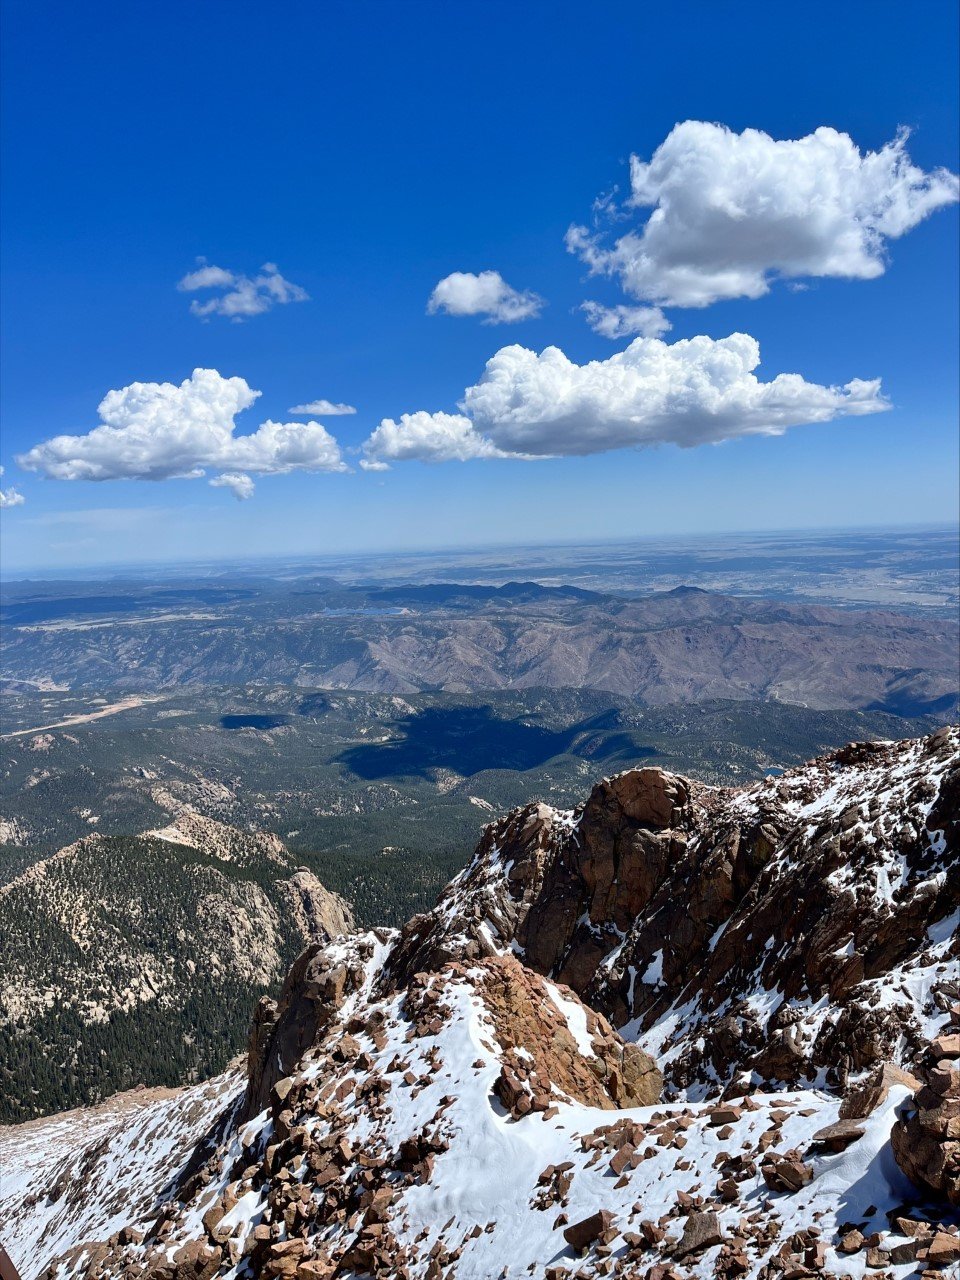
Pikes Peak provided a space for adventure and a cool place to rest at the summit. I suggest you Go early as there is a 6-7.5-hour drive to the next camping location. You can choose to camp at Pike and San Isabel National Forest again and travel the long hours the next day to the Moab area if preferred. You will spend about 3-4 hours at Pikes Peak depending how often you stop along the route.
Tickets are required to enter Pikes Peak. You can purchase them online before you go or pay at the entrance. Tickets for age 16 and older are $15 per person (Dec-April $10), ages 6-15 are $5, carload up to 5 passengers is $50 (Dec-April $35). Tickets are valid for one year from date of purchase. You can drive part way through Pikes Peak without paying for the summit view. You will stop at mile marker 16 if you choose not to drive to the summit.
You need a reservation in order to go to the summit of Pikes Peak. The tickets to the summit are to prevent too many people being there at once due to limited parking. IF you want to drive all the way to the summit a timed entry ticket is required for $2. Summit reservations are required the Friday before Memorial Day through the end of September. IF you cannot get a summit ticket for the day you will be in that area (June and July only) you can pay to get into the park and then at mile 16 you can take the free shuttle to the summit.
The summit at Pikes Peak is 14, 115 ft elevation. There are 3 gift shops along this route. Gift shops are located at mile marker 6 (Crystal Reservoir Visitor Center), mile marker 13 (Glen Cove) and at the summit. While at the summit, don’t forget to try out the absolute best donuts!!
Address: 5089 Pikes Peak Highway, Cascade, Colorado
Hours: Vary depending on time of year, see below
Drive to camping location in Utah: 6 hours 45 minutes depending on traffic
Optional: Pikes Peak is 3 hours 21 minutes south of Rocky Mountain National Park and then from that NP it is a 5-hour 8-minute drive to next destination in Moab, Utah. You could take the extra time to check out that NP before you head to Utah if preferred.
Day 2 camping at Manti-La Sal National Forest
Manti-La Sal National Forest located in Moab, Utah is the next camping location. This is an easy drive through the forest but is on a winding paved road except for the camp site pull-offs. It was very quiet at night and rather dark while camping. You can camp as a group or find a secluded spot to yourself. Most areas were already occupied when we arrived, and we had to drive a while to find a place to camp so arrive early to find the best spot.
Cost: FREE for up to 14 days. No reservation required.
Amenities: No amenities except a rock fire pit.
GPS: 38.47056, -109.36281. This GPS is to a general location. There are several areas to camp at along this long road.
Cell Signal: No, Verizon
Drive to National Park: 33 minutes south of Arches National Park. 28 minutes to Moab Tourism Center.
Day 3 - Moab Tourism Center
Start your exciting adventurous day at Moab Tourism Center in Utah as you take the T-Rex 4x4 Tours - U-Drive Experience. I suggest taking the first morning tour so you can also visit Arches National Park on the same day.
T-Rex 4x4 Tours - U Drive Experience was such a fun experience, I guarantee you will love this. I wanted to be able to drive my own 4x4 with a tour guide on an exciting adventure. This was a 2.5-hour tour and was available for ages 3 and up. Each 4x4 can accommodate a minimum of 2 people and a maximum of 4. You must be 21 years of age and older and have a valid driver’s license to drive the 4x4.
Cost: $139 for ages 18 and older and $79 for children ages 3-17. Water is provided throughout the tour. I chose this company as they had discounted prices for children where other company’s required kids to pay the same as the adult price. I am glad I chose Moab Tourism Center as they exceeded my expectations.
This tour took us on the Hell’s Revenge trail through Moab in a 4x4. It included steep inclines throughout the tour which made for an exhilarating tour. It is a scary drive at times with steep inclines on the sides, but so so exciting!!
There were 3 tour times available: 8:15 am, 12:15 pm and 4:00pm or 5:30 pm for a sunset tour. Evening time varies depending on time of year. The are closed in the winter months and reopen in March.
Kids are required to wear helmets on the tour which are provided by Moab Tourism Center. Small children are also required to use a car seat. Check out the details on visiting Moab Tourism Center.
Arches National Park
Next stop is at Arches National Park. This is a 9-minute drive from Moab Tourism Center. Arches National Park will mesmerize you with its iconic sandstone arches, towering spires, and beautiful desert landscapes. See more details on hiking at Arches National Park on this blog post.
Reservations are required from April 1st to October 31st to enter Arches NP. You can purchase your timed entry ticket for Arches National Park before you enter the park. The fee is $2 per vehicle. Tickets are easy to get, and you can purchase them up to the week before you go (as of March 2024). Tickets are required from 5 am to 6 pm daily. Arches National Park is open 24/7 so you can enter without a timed ticket outside of those hours.
Start at the Visitor Center to get a map in case you don’t have cell service and to find the locations of the souvenir shops.
Visitor Center Hours: 8 am to 6 pm daily.
Check out the details on visiting Arches National Park.
Camping is available within Arches National Park. Devils Garden Campground is open year-round. March through October this campground is typically full and advanced reservations are recommended. November through April camping is on a first come, first serve basis.
51 Campsites include: drinking water, picnic table, grill and pit & flush toilets.
Fee: $25 per night for individual sites.
OR
Drive to the next camping location: 2 hours 27 minutes depending on traffic and weather, to San Juan National Forest in Hesperus, Colorado to be near the next stop.
Optional: You can stay an extra day around this area and go to Canyonlands National Park which is 32 minutes south of Arches National Park.
Other things to do in the area
If you prefer a hotel over camping, you can use booking.com or VRBO.com to book your stay.
Day 3 camping at San Juan National Forest
San Juan National Forest in Hesperus, Colorado is located off of County Road 316 Madden Peak Road. This was an easy location to get to. There are several spots to camp at along this road. There is room for group camping or single camping.
Cost: FREE for up to 14 days. No reservations needed. You can camp within this forest up to 28 days in a 60-day period. Dispersed camping rules can be found online.
Amenities: shade trees, rock fire ring
APPS: iOverlander (similar sites)
GPS: 37.34765, -108.20158
Drive to Four Corners National Monument: 1 hour 38 minutes to Four Corners National Monument
Optional: Visit Mesa Verde National Park which is 20 minutes from this camping location. You can then stay within the NP at the campground or drive back to this boondocking location before you head to Four Corners National Monument the next day.
Day 4 - Four Corners National Monument
Next, we will head to Four Corners National Monument. Check out my blog post on visiting Four Corners National Monument. We went first thing in the morning in June 2022 and it was not busy at all. This is such an incredible experience to be in four states at once. It is really hot there in the summer so be prepared with sunscreen.
Where is it located: In the center point of four states (Utah, Arizona, New Mexico, Colorado)
Address: NM-597, Teec Nos Pos, Arizona 86514
Cost: $8 per person. CREDIT CARD ONLY. They do not accept National Park Passes.
What is there to do: Take your picture while standing in four states at once! Shop for local Native American wares to include: ornaments, dream catchers, magnets, jewelry, t-shirts and more. We only spent about 1 hour here.
Amenities: Port a potties
Hours: Vary throughout the year, see below. Closed the following holidays: Thanksgiving, Christmas, Navajo Nation Family Day (November 25), New Year Day
Drive to Toadstools Trailhead: 3 hours 25 minutes, depending on traffic.
Toadstools Trailhead
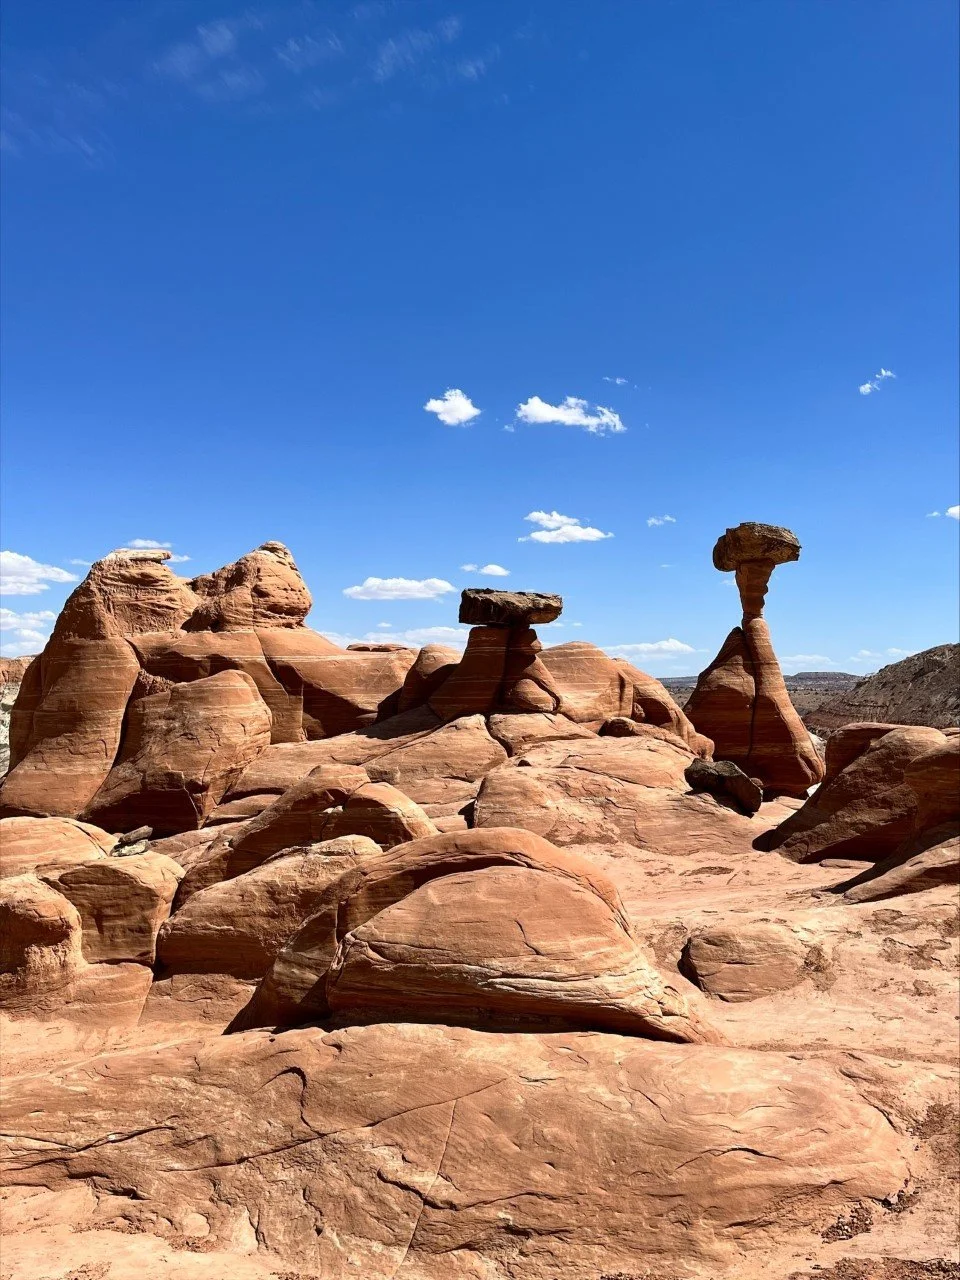
Next head over to Toadstools Trailhead for a quick hike in Utah. This hike leads you to some amazing toadstool rock formations. Check out the blog post on Toadstools Trailhead for more details.
This trail is located off of highway 89 and is FREE to visit. The trailhead is open year-round and is dog friendly. It is a 1.5-mile hike roundtrip among the wash. This hike is considered easy to moderate.
GPS Coordinates: 37.10124, -111.87328
There are port a potties at the entrance of the trailhead for your convenience.
Drive to camping location: 2 hours 21 minutes.
Day 4 camping on Willis Creek Road
Camping will be on Willis Creek Road in Kanab, Utah. This was a beautiful location overlooking the mountains. The drive to this location was quite scary in several places as some areas are really sandy and narrow. There is no cell service on this drive so download a map before you go. Although I didn’t have cell service, my GPS still worked throughout the drive. There is a sign that states 4-wheel drive recommended beyond a certain point. I was concerned but took a risk and we did fine in our campervan but I went fast through several areas where it seemed sandier, praying I didn’t get stuck. I wouldn’t take this road if it has been raining or if you are concerned about getting stuck. Please use caution.
Do I recommend this location? I would not go there again because of the drive/roads but the view was absolutely beautiful and if you have 4 wheel drive it would be a great location. There is a cliff next to the campsite so be careful with young children and pets. This area is very peaceful and quiet and is a great place to camp.
Cost: This location is FREE for up to 14 days. No reservations needed.
Amenities: Rock fire ring, mountain view, shade trees
GPS: 37.49401, -112.10456
Cell Signal: Yes, Verizon at camping spot but not on the drive there.
Drive to National Park: located about 47 minutes from Bryce Canyon National Park.
Day 5 - Bryce Canyon National Park
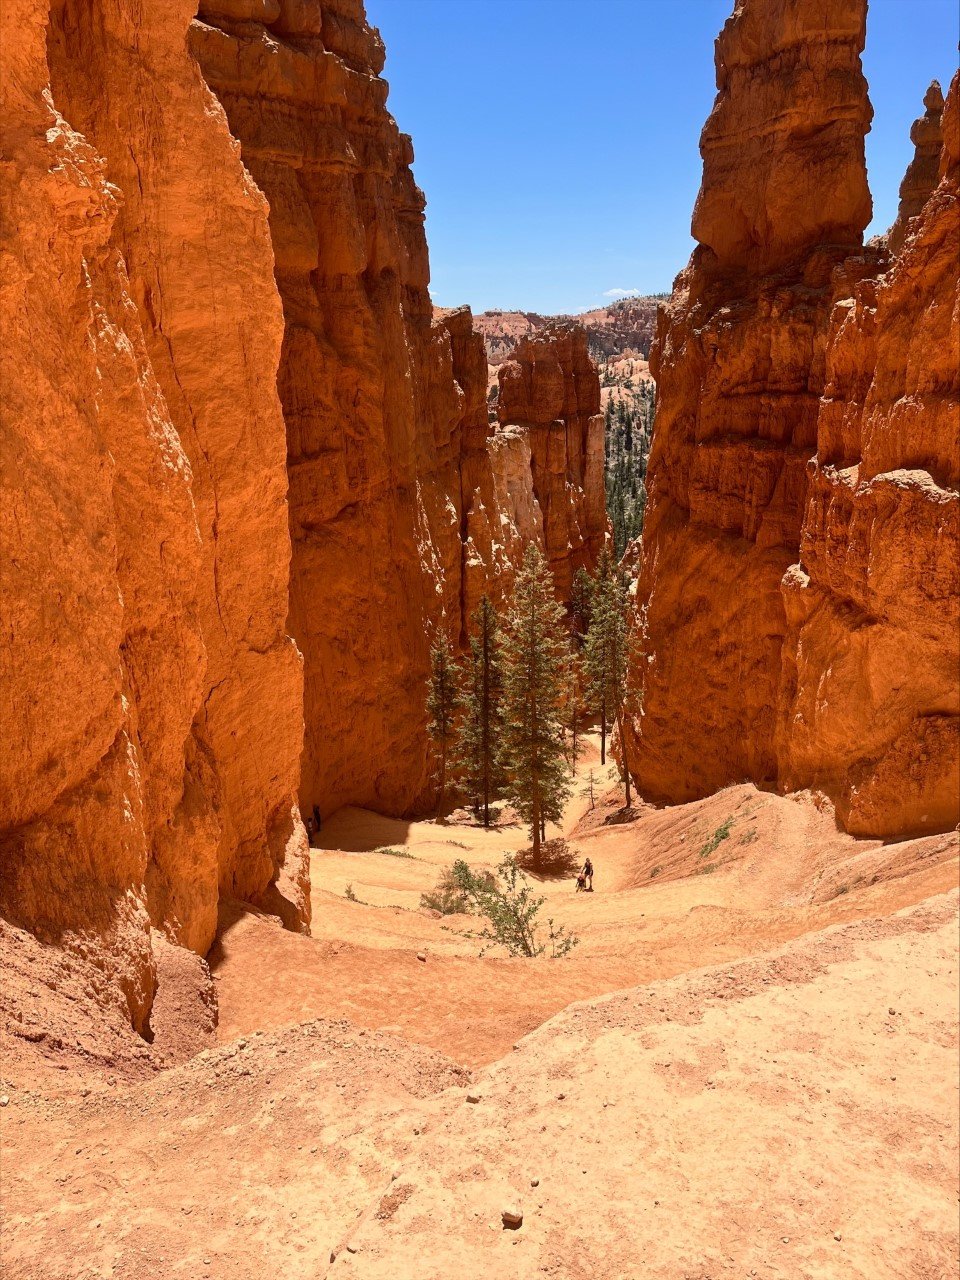
Bryce Canyon National Park is located in Bryce, Utah. This is my absolute favorite national park so far. The hoodoo’s and switchbacks are so amazing. I just stared in wonder at the beautiful landscape while at this park. Check out more details on Bryce Canyon National Park.
Hours: Open 24 hours daily
Address: UT-63, Bryce
Visitor Center Hours: Summer 8am to 8pm, fall and spring 8am to 6pm, winter 8am to 4:30pm
Cost: $35 per private vehicle for up to 15 passengers and good for 7 consecutive days. FREE with an America the Beautiful National Park pass. No reservations required.
Things to do: hiking, ranger led programs, horse back riding, and more.
Pets: only allowed in the campground, paved roads, parking lot, and Rim Trail between Sunset Point and Sunrise Point.
Camping is available: Sunset and North campgrounds. See details below.
Lodge accommodations and restaurants available within the park.
Other things to do in the area
Day 5 camping at Bryce Canyon National Park
Camping at Bryce Canyon National Park. Laundry and showers are available within the park at the general store and can be used even if not staying at the campground.
North Campground: This campground has 100 camping sites. No hookups available. Reservations are required May 19 to October 7. First come, first serve October 8 to May 18.
Amenities: flush toilets, fire grate, picnic table, trash. Dump station is available in the summer and is included in camping fee and potable water is available seasonally. No hammocks can be hung from trees and there are only certain times during the day when a generator can be run.
Cost: $30 RV site, $20 tent site. 50% discount with Senior/Golden Age/Access pass.
South Campground: This campground has 99 sites. There are no hookups. Dump station is located in the North campground and is included in camping fee. Potable water near dump station.
Amenities: fire grate. Potable water, pit toilets, trash are all available seasonally.
Cost: $30 RV site, $20 tent site. 50% discount with Senior/Golden Age/Access pass.
Drive to Zion National Park: 1 hour 21 minutes
Stock image at nps.gov
Day 6 - Zion National Park
Zion National Park was our next stop in Springdale, Arizona. We have been to Zion NP twice and both times walked through The Narrows, which we love. Even the teenagers like this hike and ask for it when we are in the area. It is a 10-mile hike through water and over large boulders, but you can stop at any point and turn around. There are multiple other hikes at this park for you to check out. Check out my blog post for more details on hiking The Narrows.
Visitor Center hours: Open from 8am to 7pm. Restrooms at the visitor center.
Shuttle bus hours: 7am to 7:15pm in the summer and 8am to 5:45 in the fall and winter. Shuttle runs every 15 minutes.
Cost: $35 for a vehicle up to 15 people and is good for 7 consecutive days. We had a National Park Pass so were able to get in this park for FREE.
Park hours: 24 hours a day everyday
Pets are allowed in the park but the only trail they can go on is the Pa’rus trail.
Drive to camping: 25 minutes
Day 6 camping on North Bridge Sheep Road West
Camping on North Bridge Sheep Rd West located in Virgin (La Verkin) Utah. This spot is located off of a gravel road but easy to travel on. This area had multiple camping spots. You could camp as a group or by yourself. We did see a couple other campers but they were far enough away you couldn’t hear them. I loved this location!
MORE CAMPING LOCATIONS IN UTAH
Cost: FREE, no reservations needed. 14-day limit on BLM land within a 28-day time period.
Amenities: rock fire ring, mountain view. No shade trees.
APPS: iOverlander (BLM camping & BLM 30 km Zion), Campendium (several), The Dyrt (Hurricane Cliffs), FreeRoam (Hurricane Cliffs)
GPS: 37.18582, -113.22221
Cell Signal: Yes, Verizon
Drive to Valley of Fire State Park: 2 hours
Day 7 - Valley of Fire State Park
Head to Valley of Fire State Park to view the amazing multiple rock deposits that make this view intriguing. From sandstone to limestone the varying colors in the rocks is something worth seeing. Check out this Valley of Fire State Park blog post for more details.
Location: Overton, Nevada.
Fee: $10 for Nevada residents and $15 for non-Nevada residents. You will pay the park fee at the self-paying station at the entrance of the park. Insert cash in the provided envelope and put in cash box. Cash box is located at the Greetings From sign below at the Elephant Rock trailhead.
Hours: Daily from sunrise to sunset 365 days a year
Pets are welcome except in the Visitor Center.
Visitor Center: Open 9 am to 4 pm daily. This center offers a history of the park along with your souvenir needs. It is a smaller visitor center but does have drinks in the cooler as well. Restrooms available here also.
Camping: There are 3 campgrounds available within the park if you prefer to stay here to save money instead of staying in Las Vegas. Prices start at $10 a night.
Drive to Las Vegas: 1 hour
Day 7 hotel stay in Las Vegas
Camping
Next stop is Las Vegas. For this trip I recommend staying at Mandalay Bay Resort & Casino especially if you have kids who will want to swim to escape the heat. This hotel has the best pools of all the hotels on the strip. They have several pools, wave pool, lazy river, and food can be ordered from your lounger. You have the option to choose any hotel to stay at along the strip if you prefer. Check out more details on staying at Mandalay Bay in Las Vegas.
Address: 3950 Las Vegas Blvd
Cost: Depends on view, how many people per room and time of year. We paid around $165 for five of us in the summer months with a pool view. (summer 2022)
Amenities: Pool, lazy river, swim up bar, casino, restaurants, bars, shopping, Starbucks and so much more.
Parking: parking is available at the hotel. However we had our high top campervan and could not fit in their parking garage. We had to park in the parking garage behind the Excalibur hotel where our van would fit and walk to the Luxor hotel and then take the tram from the Luxor hotel to Mandalay Bay (Tram is free). It is $30 a day to park or $50 a day for vehicles over 30 feet.
Where to eat: We took an Uber to Gordon Ramsay Burger in Planet Hollywood from Mandalay Bay. There was a line to get into the restaurant, but it went fairly quick. The food was so so good and I definitely recommend this restaurant. Our Uber one way cost $26.85 with tip.
Walk the strip: After eating we walked back to our hotel so we could view the strip along the way. It is hot in the summer so bring plenty of sunscreen. It is even really hot at night. There are so many places to shop, and entertainment is available at each hotel, allowing for plenty of things to do. Don’t forget to check out the Bellagio Fountain FREE water show at the Bellagio Hotel. I love this water show as the water dances in sync to the music.
Drive to Seven Magic Mountains: 20 minutes
You can use booking.com or VRBO.com to book your stay in Las Vegas.
Other things to do in the area
Day 8 - Seven Magic Mountains
Oil change first
At this point in our trip, we stop to get an oil change; this is important especially if you have been traveling for a while. We always go to Jiffy Lube in Las Vegas where we get to stay in our campervan while they change the oil.
Address: 3420 South Rainbow, Las Vegas
Cost $110.95 (June 2022)
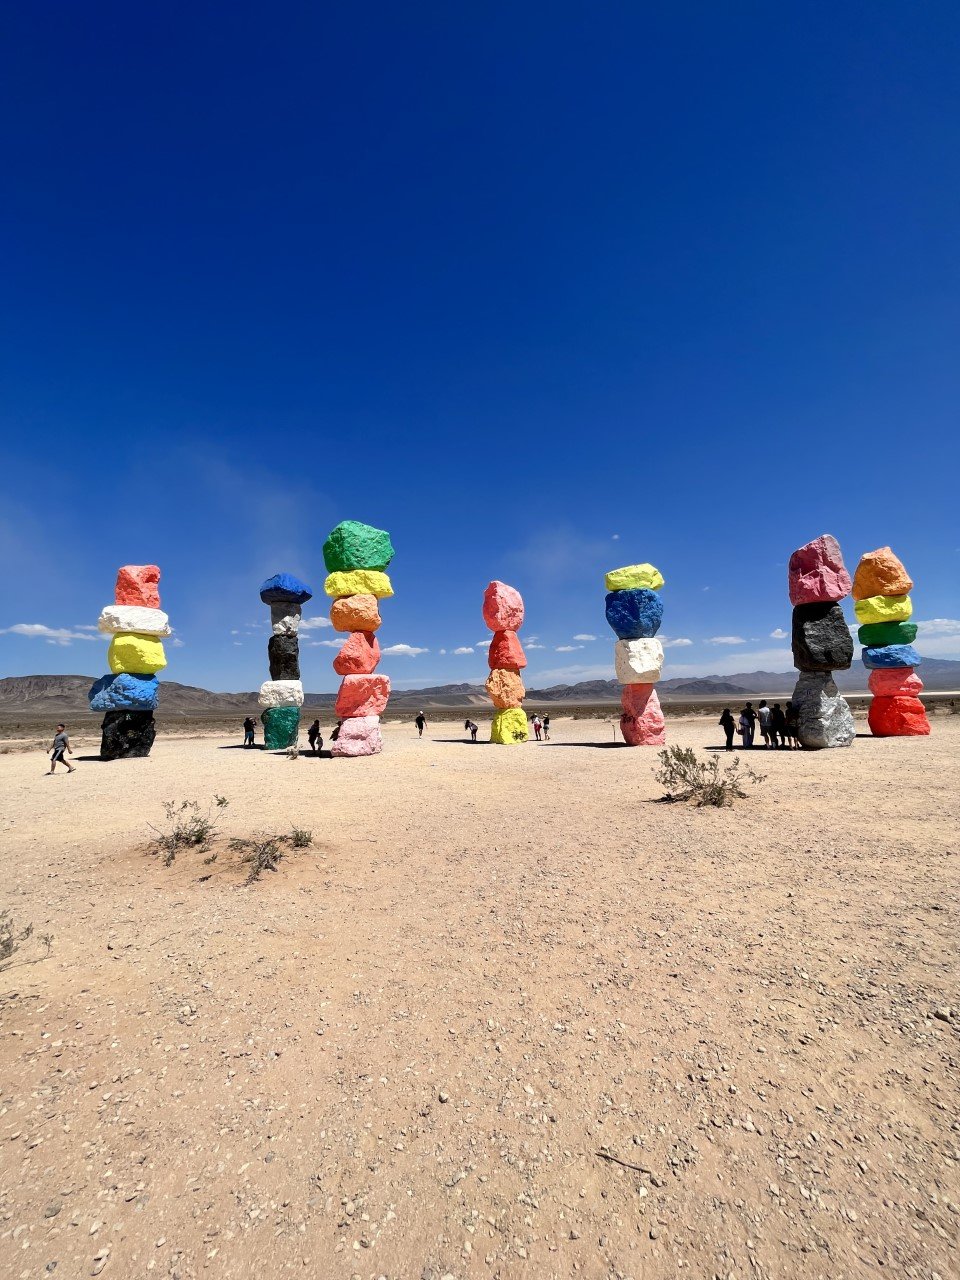
Next you will head to Seven Magic Mountains on your way out of Las Vegas. This stop is located about 20 minutes outside of Las Vegas where Swiss artist Ugo Rondinone created this unique display of large colorful boulders stacked on top of each other in 2016 as a temporary display. Due to popularity, it has remained up and available to visit. This is a FREE attraction. Parking is limited but FREE. It is a short flat walk to the rock display on a dirt/gravel pathway. Time spent at this location would be 30 minutes max. Pets are welcome if on a leash. There are no restrooms or any other amenities at this location. Check out more details on visiting Seven Magic Mountains.
Drive to camping location: 1 hour 28 minutes
Day 8 camping on Kelbaker Road
Located on Kelbaker Road in Amboy, California within Mojave National Preserve. This spot is easy to get to and includes gravel/sandy sites with big boulders to climb on. This location is close to highway 40 for convenience which provides minimal to no noise. On our drive to this location the temps got up to 114 degrees. By the time we arrived at our location the temp had dropped, and it was down to 80’s at night which I was thankful for. Be very careful of sandy areas at this location as you drive in. Get out and look before you park to make sure you will not get stuck.
Cost: FREE camping for up to 14 days in a 30 day period.
Amenities: rock fire ring, no shade trees
GPS: 34.74570, -115.65200
Cell service: Yes, Verizon (1-2 bars)
Drive to Joshua Tree National Park: 1 hour 8 minutes
Day 9 - Joshua Tree National Park
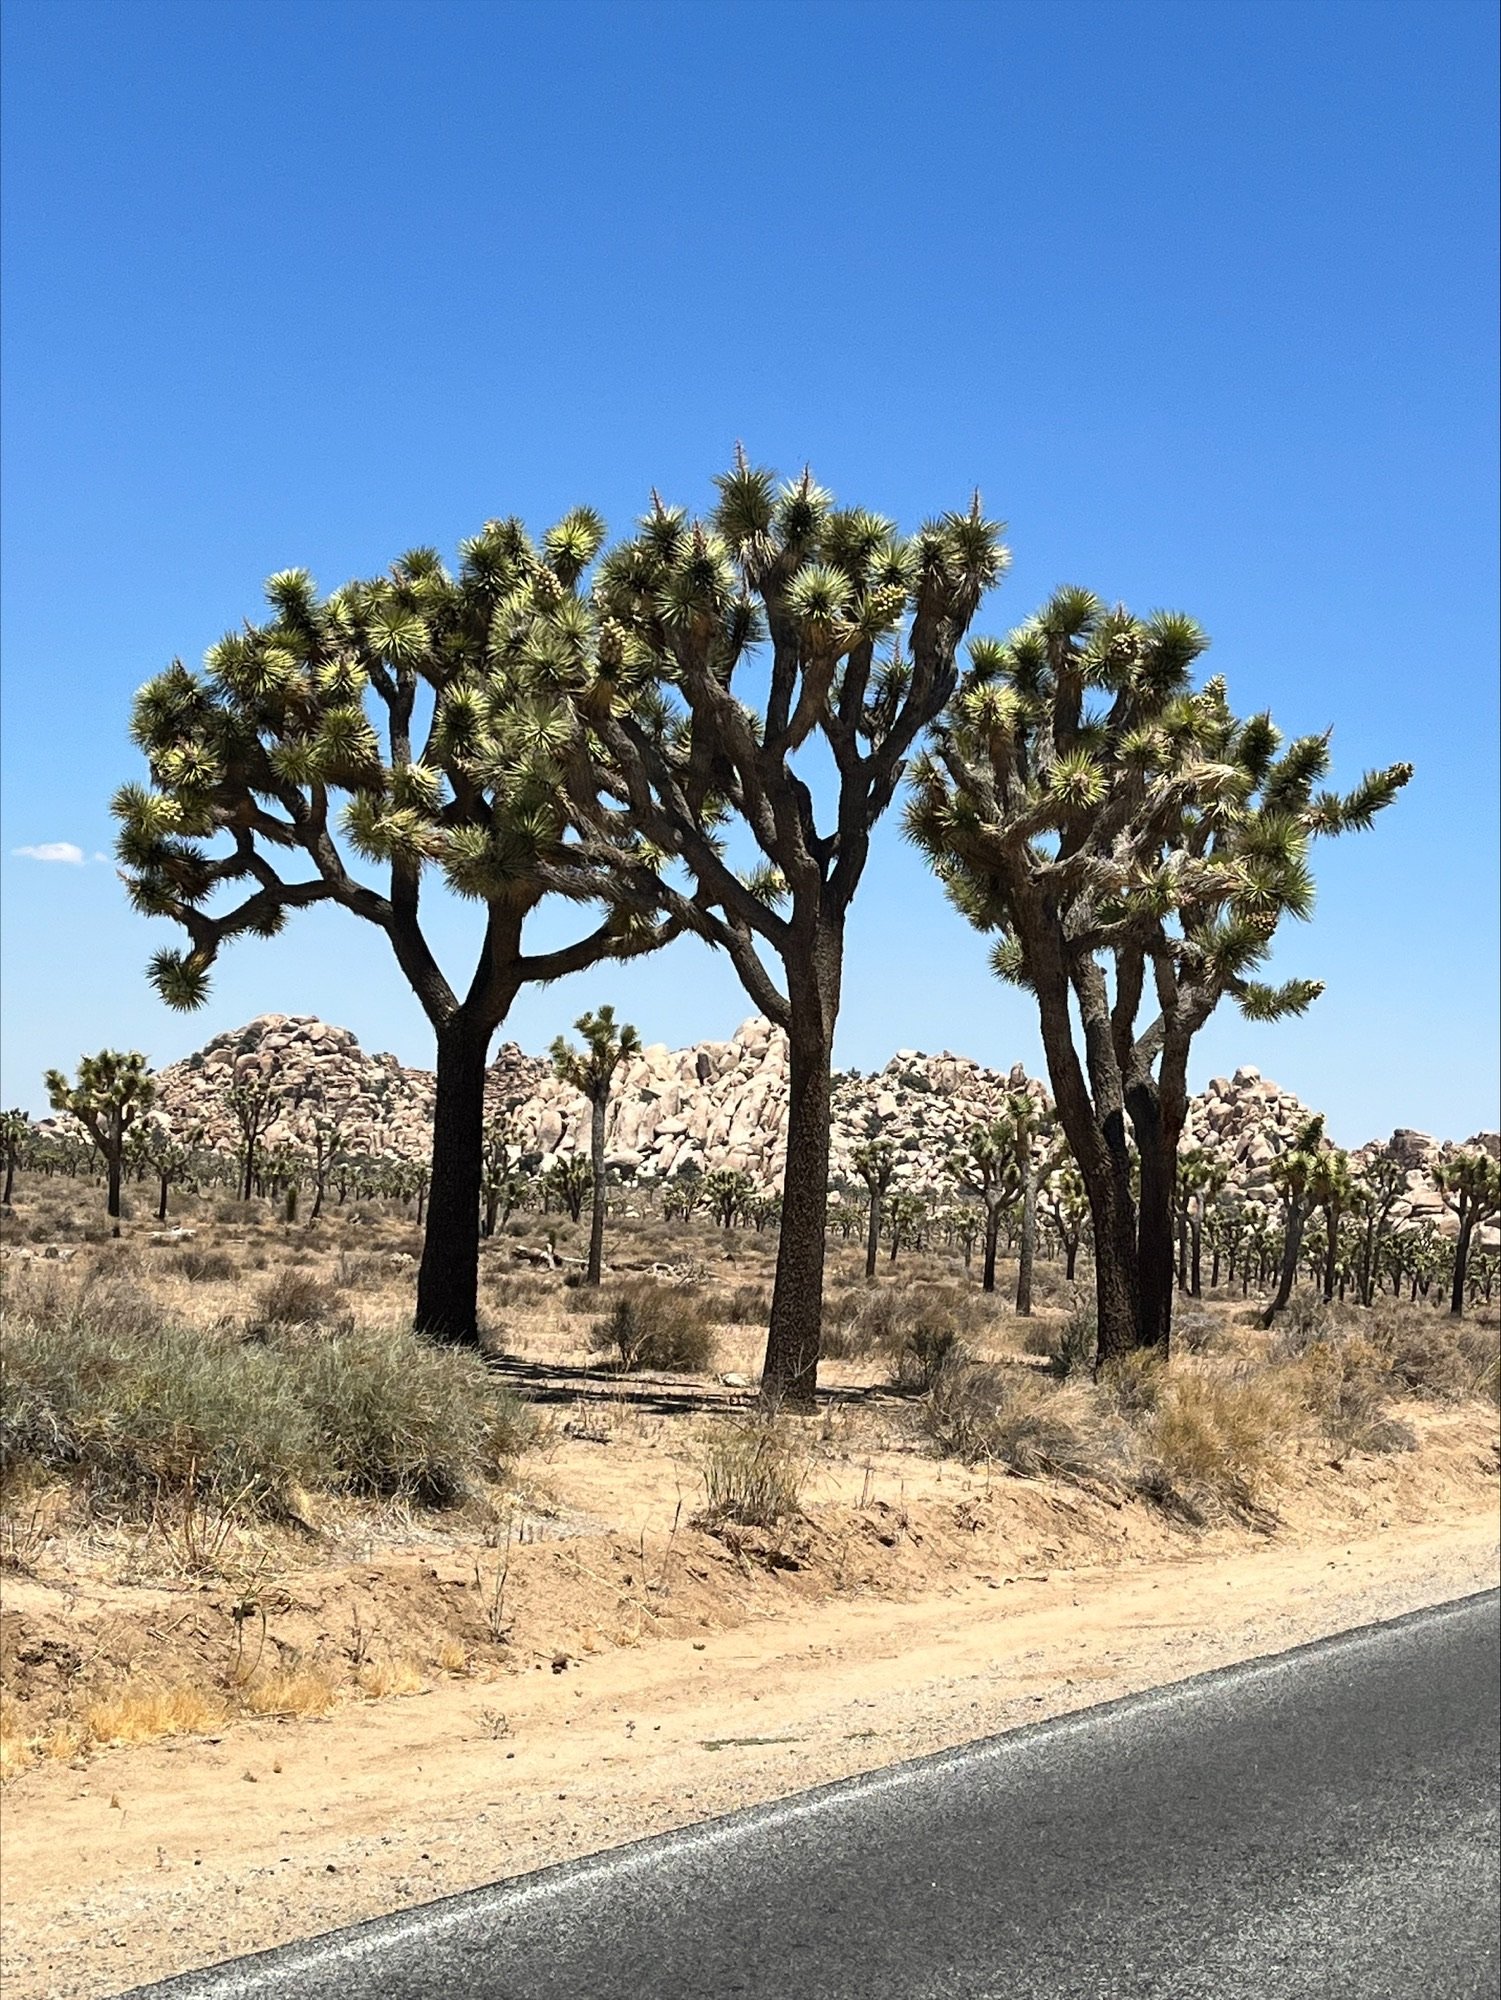
Joshua Tree National Park is the next stop on our tour in Joshua Tree, California. This beautiful park has the most creative trees and reminds me of something Dr. Seuss would have created through his imagination. I loved these trees and this park! Check out my blog post for more details on Joshua Tree National Park.
Hours: Open 24 hours/ 7 days a week
Address: 74485 National Park Drive, Twentynine Palms, California
Cost: $30 for private vehicle which is good for 7 consecutive days. Or FREE with a National Park pass.
Cell service: very limited (Verizon)
Drive to Hollywood sign: 2 hours 19 minutes or you can stay at one of the 8 campgrounds at Joshua Tree before heading to the Hollywood sign the next day.
Other things to do in the area
Hollywood sign in Los Angeles
Visiting the Hollywood sign is the next stop along our route. This view is located at Lake Hollywood Park. The perfect area for a picnic as you take in the iconic view of the Hollywood sign. This spot makes for great pictures and allows for relaxing on the lawn. On our way to this spot GPS took us to Ledgewood drive through some winding roads in a residential area. The neighbors were not thrilled with me driving through their narrow streets in our big van as I got some dirty looks from the neighbors. On the way out we took Canyon Lake drive to Tahoe Dr and that road was much easier to navigate.
Address: 3160 Canyon Lake Drive, Los Angeles, CA
Hours: Daily from sunrise to sunset
Amenities: children’s playground and picnic tables. Free parking along the street.
Drive to Oak Flats Campground: 52 minutes
FREE Budget Friendly Travel Guide
Sign up with your email address below to receive this FREE Budget Friendly Travel Guide to help plan your next travel journey.
Day 9 camping at Oak Flats Campground
We stayed at Oak Flats Campground in Angeles National Forest in Castaic, California. This smaller campground was the perfect place to stay for the night.
Cost: FREE but you are required to have a National Park Pass to stay here. No reservations needed. First come/first served. Maximum RV length is 22 inches.
Amenities: This location has 20 campsites. Each site includes fire pit, picnic table, and shade trees. Vault toilets and trash are available within the park.
GPS: 34.59917, -118.72192
Cell signal: Yes, Verizon
Drive to Sequoia National Park: 2 hours 43 minutes
**Note: It will be harder to find boondocking locations these next few days. We stayed at a gas station, back of a hotel and Walmart to save money. Think of those places as your options if you choose or you can splurge and book a hotel at the links below. I will list campgrounds nearby that have good reviews and would be options as well. Just remember that using a hotel will increase the cost of your trip. There are several sites you can use to book a place to stay such as Booking.com, VRBO.com, or Trivago.com
Day 10 - Sequoia National Park
Sequoia National Park was a place I was excited to visit in California. This park is known for its giant sequoia trees, including the famous General Sherman Tree, the world’s largest tree by volume. I couldn’t wait to view the huge Redwood trees. Upon exploration, I was amazed at how soft the bark was and how tall the trees were.
Hours: Open 24 hours a day/365 days a year. Some roads are closed in the winter.
Visitor Center hours: Foothills Visitor Center hours 9am to 4:30pm, Giant Forest Museum 10am to 4pm, Kings Canyon Visitor Center 9am to 4:30pm, Lodgepole Visitor Center 9am to 4pm, Cedar Grove Visitor Center 9am to 5pm. Hours subject to change depending on weather and time of year.
Cost: $35 per vehicle which is good for 7 consecutive days.
Pets: allowed in parking areas, paved roads, campgrounds, and picnic areas
Things to do: Fishing hiking, back country camping, ranger led programs, horseback riding, rock climbing, skiing, and cave tour.
Day 10 camping at Sequoia National Park
If you plan ahead and can stay at a campground in Sequoia National Park that is your best bet in this area. We stayed at a Love’s Gas Station instead, but I am going to give the campground information in case you want to stay there. It is likely you will need to plan ahead in order to find availability at these campgrounds. BEWARE of bears at these campsites and keep all food away and hidden. Make loud noises, wave hands, bang on items if you see a bear to scare them away! Store all food in the food storage lockers, provided.
Pets are allowed at most campsites if on a leash.
Azalea Campground has 110 campsites. No electric sites. Limited sites in the winter months. Potable water, flush toilets, trash, food storage lockers are available year round. Cost is $28 per night. $14 with Senior/Access pass.
Crystal Springs Campground has 50 sites and are by reservation only. No electric sites. Potable water, flush toilets, trash, food storage lockers are available seasonally. Cost is $28 per night or $14 with Senior/Access pass.
Sunset Campground has 158 sites. No electrical sites. Potable water, flush toilets, trash, and food storage lockers are available seasonally. Cost is $28 per night or $14 for Senior/Access pass.
Lodgepole Campground has 214 sites by reservation only. No electrical sites. Trash, food storage lockers, potable water, flush toilets and dump station available seasonally. Cost is $28 per night or $14 for Senior/Access pass.
Potwisha Campground has 42 sites. Reservations only up to four months in advance. Trash, food storage lockers, potable water, and dump are available year round. Campground typically doesn’t have snow in the winter months. Cost is $28 per night or $14 with a Senior/Access pass.
Buckeye Flat Campground has 27 sites. Reservations only. No electrical sites. Food storage lockers, trash, flush toilets and potable water are available seasonally. Cost is $28 per night or $14 for Senior/Access pass.
Dorst Creek Campground has 222 sites. Reservations only. Trash, potable water, flush toilets, and food storage lockers are seasonally. No showers available. There are picnic tables, fire pits and grills. Cost is $28 per night or $14 with Senior/Access pass.
Sentinel Campground has 82 sites. Trash, food storage lockers, flush toilets, potable water, and camp store are seasonal. Picnic tables, fire pit and grill available. Cost is $28 per night or $14 with Senior/Access pass.
Canyon View Campground has 16 sites. Group camping only. Trash, food storage lockers, potable water, camp store, and flush toilets are seasonal. Picnic tables available. Costs between $50 to $70 a night. Trailers and RVS are not permitted.
Moraine Campground has 121 sites. Trash, food storage lockers, potable water, camp store, and flush toilets are seasonal. Picnic tables available. Cost is $28 per night or $14 with Senior/Access pass. No hookups or dump station.
Sheep Creek Campground has 111 sites. Trash, food storage lockers, potable water, camp store, and flush toilets are seasonal. No electric sites. Picnic tables available. Cost is $28 per night or $14 with Senior/Access pass.
Cold Springs Campground has 40 sites. Trash, food storage lockers, potable water, and flush toilets are seasonal. Picnic tables available. Cost is $28 per night or $14 with Senior/Access pass. Trailers and RVs are not permitted.
Atwell Mill Campground has 21 sites. Trash, food storage lockers, potable water, and flush toilets are seasonal. Picnic tables and fire pit/grills available. Cost is $28 per night or $14 with Senior/Access pass. Trailers and RVs are not permitted.
**All campground prices are from 2023.
**Next stop is my favorite and the most beautiful place to visit along the west coast! You will absolutely love Big Sur. I cannot say enough good things about this area, and I cannot wait for you to visit there!!
Day 11 - Big Sur
There are a few road closures along Big Sur due to rock and mud slides near Big Creek Reserve and Limekiln State Park as of February 2024
〰️
There are a few road closures along Big Sur due to rock and mud slides near Big Creek Reserve and Limekiln State Park as of February 2024 〰️
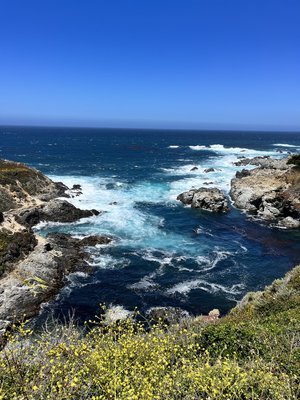
Big Sur is absolutely amazing. There are so many stops along highway 1 that you will want to visit. I narrowed it down to my favorites. You will want to travel north to south to get the best views of the ocean. You will then follow the highway back up north when finished. You will want to print a map of all the stops as you will not have cell signal in most of the areas while traveling. This map will have the mile markers listed for easy reference.
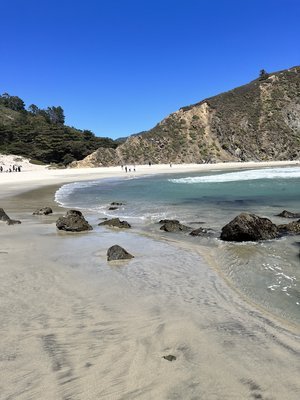
Garrapata Beach
at mile marker 63. Beautiful view of the beach with the mountains as a backdrop coming onto the beach. This beach is only about 1/2 mile long so easy to walk. Parking is free on the side of the road on highway 1. Take the small path down to the beach, lined with lovely flowers along the path. It was very windy at the beach during our visit so bring a jacket if needed. Although this is a really nice beach, I am not sure I would take the time to stop here again.
Bixby Creek Bridge
at mile marker 59.90. This is a famous iconic bridge. Wildflowers, when in bloom, make a beautiful backdrop to this location. Built in 1932, this bridge is one of the tallest single-span concrete bridges in the world. Parking is very limited, but this is a must stop on your route.
Pfeiffer Beach
between mile marker 45-46. (not Pfeiffer State Park). Rocky arches and purple sand make this location magical!! It was also very windy at this beach. Go slow near this stop off of highway 1 as it is hard to find. When you see the Big Sur Lodge on your left, it’s not too much further. It’s a right turn off, that almost feels like a U-turn. You’re looking for a yellow “narrow road” sign and Sycamore Canyon Road, a sharp turn-out on the right side of Highway 1. After turning, you’ll follow that road for a few miles, past houses and pastures with horses, and eventually you’ll end up at the parking lot. You will drive on a sketchy one lane road to the parking lot. Parking is limited and fills up quick. You may not be able to enjoy this area if can’t find a parking spot or may have to wait. The beach is a short walk from the parking lot.
Hours: 9am - sunset.
Cost: $15 day use pass. Cash preferred.
No camping is allowed.
Nepenthe Restaurant
at mile marker 43.9. The Log Cabin where the restaurant sits, was built in 1925. Owners of the cabin felt the land was too beautiful to keep to themselves, so they opened up their home for all to enjoy. What made this restaurant worth the stop is the beautiful view of the ocean that sits 808 feet above sea level while sitting outside on their deck as we ate our meal. The food is a little pricey and was not my favorite place to eat but the view makes you forget about all of that. After your meal, don’t forget to shop at their store, The Phoenix Shop, for some fun souvenirs. Pick up a Nepenthe shirt/sweatshirt, jewelry, cookbooks, art, bath and body collections, kitchenware, stationary, food, games and more.
Nepenthe Hours: Lunch 11:30am to 4:30pm, dinner 5:00pm to 10:00pm. Closed for dinner on Thanksgiving and Christmas Day. No reservations accepted.
The Phoenix Shop Hours: daily from 10:30am to 6:00pm
Partington Cove
at mile marker 37.85. You will park on the side of the road and go around the green gate down to the cove. This is a little over a mile hike (roundtrip) down a steep hill. You will eventually cross a bridge and you can go into the tunnel for a nice view of Partington Cove, and then retrace your steps and go to the left outside of the tunnel and onto the impressive beach area (although there is no real beach here). At the beach area you can sit peacefully on the large rocks and just watch the waves crash onto the rocks for hours. I found it rather peaceful. Be careful because you do have to walk over a lot of larger boulders to get close to the water. Do not attempt to go into the water!
Julia Pfeiffer Burns state park
to view McWay Falls near mile marker 35.8, you will enter Julia Pfeiffer Burns State Park. This was one of my favorite views along Big Sur as you enjoy this 80-foot waterfall that drops from the granite cliffs into the ocean below. You cannot access this waterfall but can view it from the top trail.
Hours: 8am to sunset.
Cost: $10 per car.
Dogs are not allowed on the trails.
Carmel Beach
We then headed back north through Big Sur again and ended the night at Carmel Beach. This area continues with stunning coastlines of Big Sur, white sandy beaches, and dramatic cliffs. We ended our night with a sunset on the beach. It doesn’t get better than that. After sunset you can walk along Ocean Ave to do a little shopping or find something good to eat. There is plenty of parking throughout the area.
FOR MORE DETAILS AND PICTURES ON VISITING BIG SUR IN CALIFORNIA CHECK OUT MY BLOG POST
Other things to do in the area

Day 11 camping along Big Sur
There are several camping options within Big Sur. I did not plan to stay at a campground so we could save money, but I would definitely try a campground next time we are in the area. We stayed at the back of a hotel close by instead, not a legal overnight parking spot but I was desperate.
If you chose to stay at one of these campgrounds you could take your time along Big Sur and be able to stop at more locations along this route. Here are a few campgrounds I found along Highway 1 with good reviews.
Riverside Campground & Cabins. 34 sites for tents/RV and 12 cabins. Amenities: picnic table, fire pit, hot showers, laundry, and restrooms. Electricity and water at RV sites. River tubing nearby.
Pfeiffer Big Sur State Park. 189 RV and tent sites. $35-50 a night. Amenities: fire pit, picnic table, water, hot showers (tokens-$1.00 = 5 minutes), toilets and dump station. No hookups.
Fernwood Campground and Resort. RV ($85-105 night- water & electricity)/tent/motel ($180-235 night)/cabins and more. Amenities: restaurant, general store, tavern, events, camping supplies, hiking.
Ventana Campground. TENT CAMPING ONLY. Amenities: bath house, water nearby, picnic table, fire pit.
Big Sur Campground & Cabins. Tent/RV (water & electric)/Cabins. Amenities: picnic table, fire ring, bath house, dump station.
**Campground prices are from 2023.
Drive to Santa Cruz from Caramel Beach: 54 minutes
Day 12 - Santa Cruz Beach Boardwalk
Santa Cruz Beach Boardwalk is the next stop. This was our second time at Santa Cruz and of course we had to get chocolate covered bacon again! So yummy. Santa Cruz Beach Boardwalk is right on the beach and gives a great ocean view next to the amusement park. There are several rides, carnival games, arcade games, and fair food to enjoy. You can pay to ride the rides or just enjoy walking along the boardwalk. There is no fee to enter this area. You can also enjoy time on the beach although the water is cooler than Florida beaches, but it still has an amazing beach with ocean views. Check out more details on visiting Santa Cruz Beach and Boardwalk.
Address: 400 Beach Street, Santa Cruz, California
Hours: Vary throughout the year. Typically, open between 10am to 12am. Closing between 8pm to 10pm.
Cost: Wristband $39.95 -74.95 unlimited, all day. Discounted price if purchased online.
Rides closed January to March during weekdays.
Parking: $20
Beach: FREE
What there is to do: Eat, amusement park rides, bathrooms, arcade, beach, mini golf, laser tag, restaurants nearby.
You still have access to the beach when the Boardwalk is closed.
Drive to San Francisco: 1 hour 40 minutes
Day 12 Camping near Santa Cruz
Santa Cruz Redwoods RV resort in Felton, California.
Address: 4980 Highway 9, Felton, CA. It is NOT recommended to take an RV or Trailer on Highway 9 North from Santa Cruz to this campground. From Santa Cruz, exit on highway 17 North and travel 3.1 miles and take the Mt Herman Rd exit into Scott’s Valley. Make a right on Graham Hill Rd and go 0.2 miles to highway 9. Make a left on highway 9 and go 1.3 miles. The entry to the park will be on the left. (These are the directions from this resorts website) This park is 22 minutes from Santa Cruz Beach & Boardwalk
Cost: $90-135 a night. Tent $60 a night. Prices increase during the holidays.
Amenities: sewer, water and electric hookups. Clubhouse, restrooms, showers, laundry, complimentary cable TV, Wi-Fi, swimming, fishing and play set for kids. Fire pit rental is $10 for entire stay.
Pets: Yes
OR
Henry Cowell Redwoods State Park is located in Scotts Valley, California.
Address: 2591 Graham Hill Road, Scotts Valley, California. There are three separate entrances to this state park. When you turn left on Graham Hill you will travel 2.5 miles and the entrance will be on your right. This park is 14 minutes from Santa Cruz Beach & Boardwalk
Cost: Park fees are $10 a day.
Camping cost: $35 a night.
Park hours: Sunrise to sunset
Camper maximum feet is 35 and trailer is 31 feet.
Amenities: flush toilets, fire ring, food locker, picnic table, some shade. No water, electric or dump. Fee for showers.
Pets: Yes in campground, picnic area, parking lot and a few trails.
**Campground prices are from 2023.
Day 13 - San Francisco
The final stop
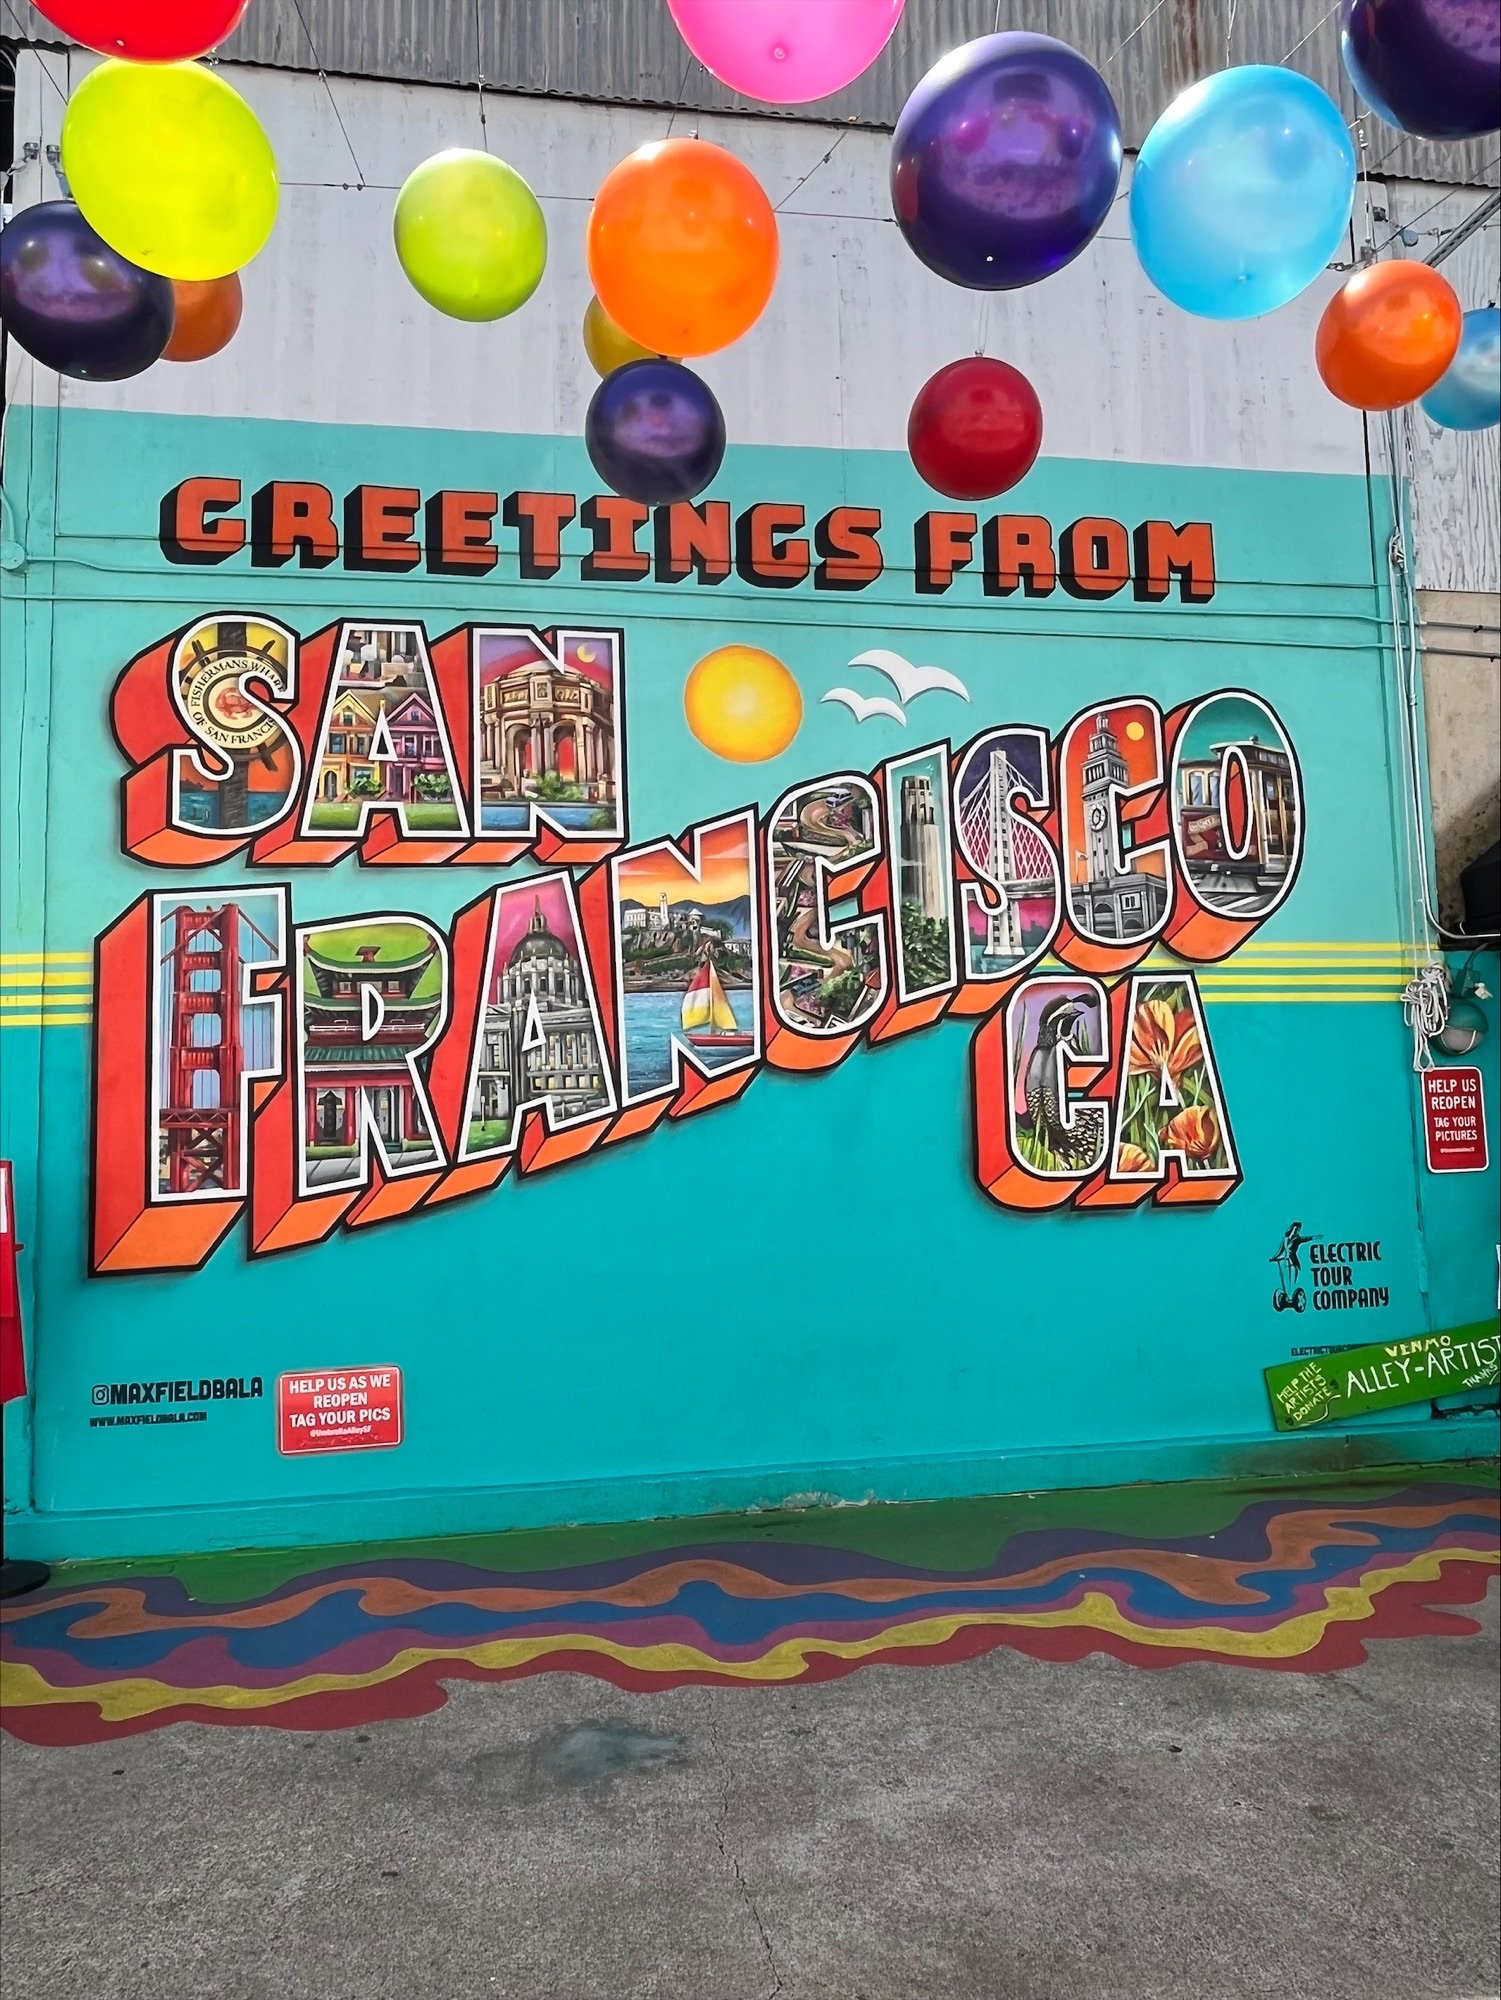
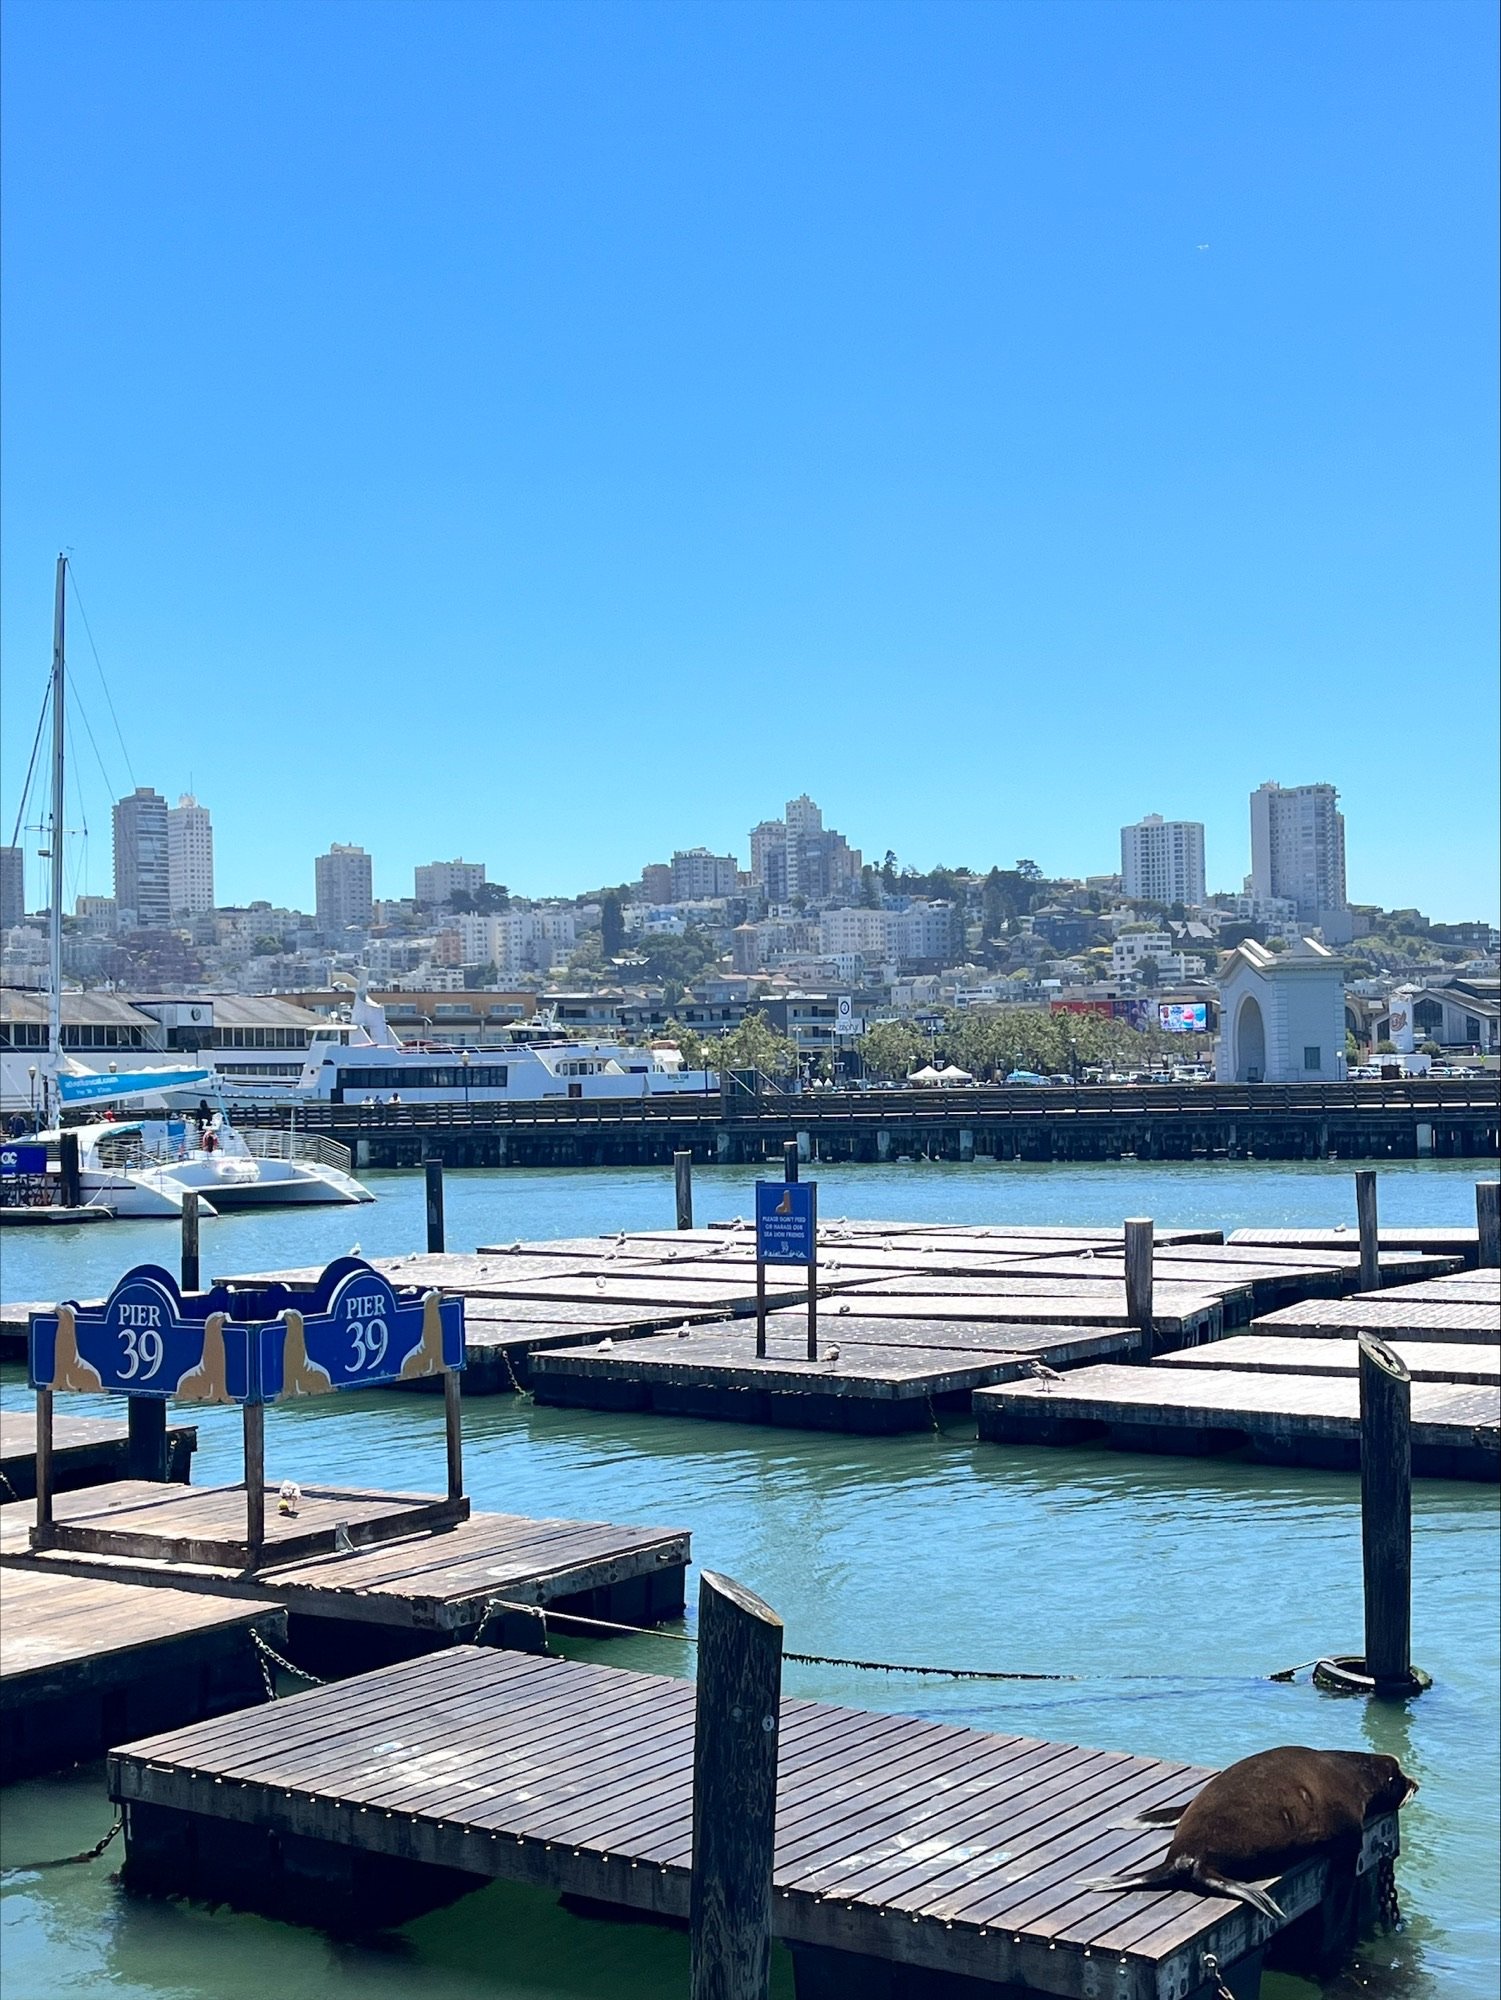
Head to Pier 39 in San Francisco. At the pier and around the area you will find so many different things to do. You can take some time to do a little shopping, buy souvenirs, and eat at a restaurant. Stop by Umbrella Alley, and view the beautiful artwork created by local artists. and on display for the perfect instagramable picture.
Other things to do in the area
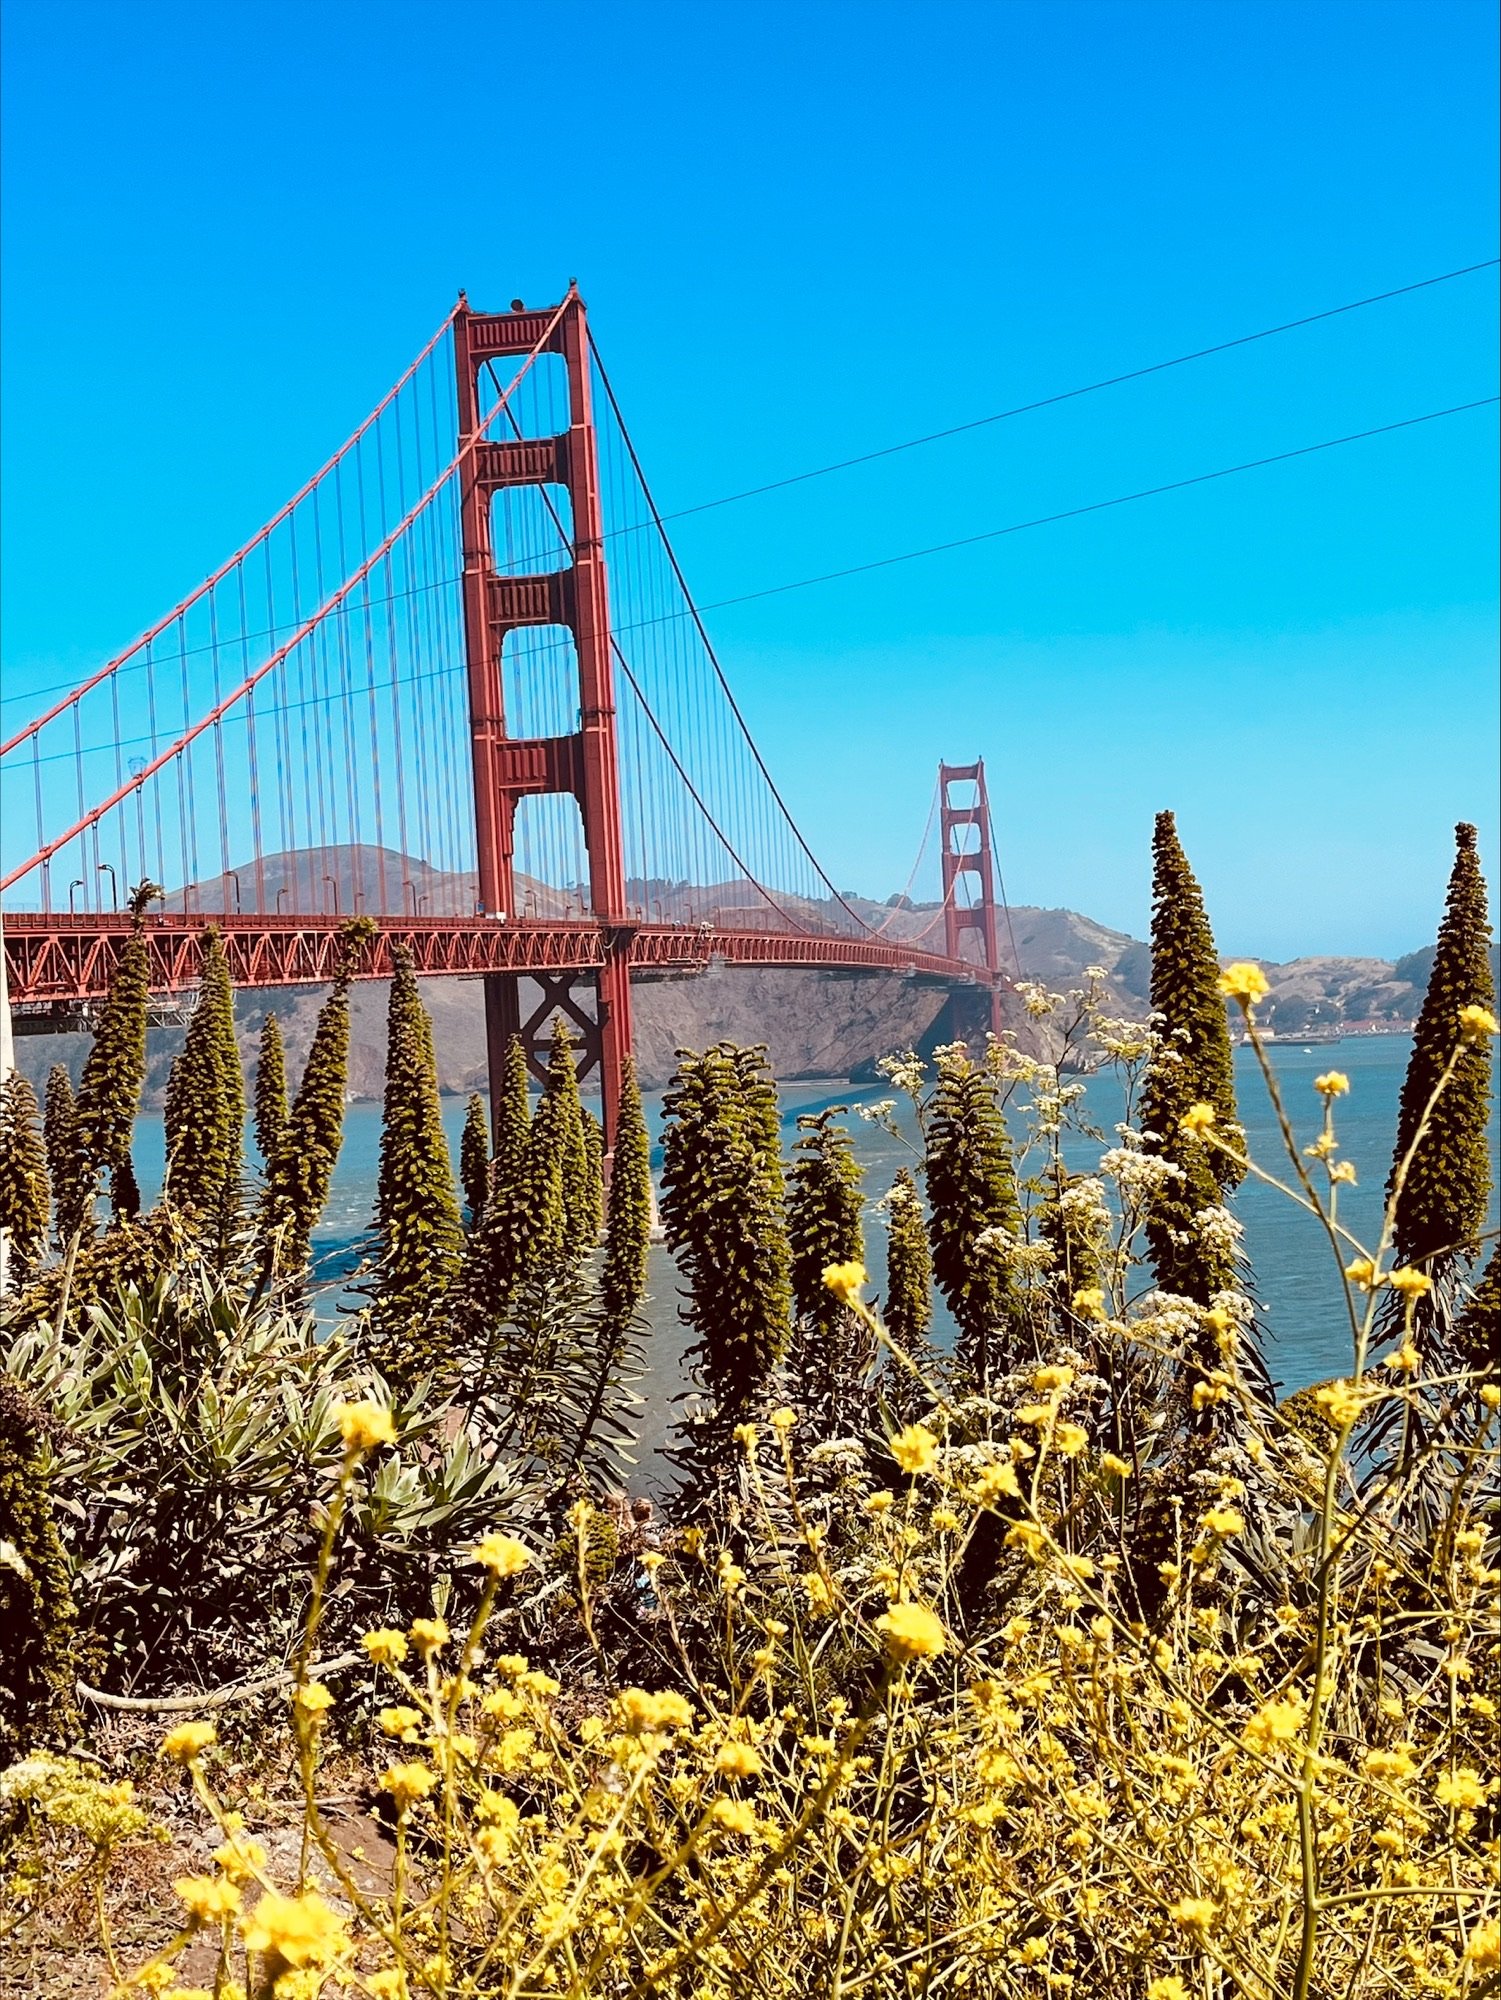
Don’t forget to visit the Golden Gate Bridge where you can walk on the bridge for a beautiful view of the Bay and surrounding area. Check out more details on visiting San Francisco.
Day 13 Camping near San Francisco
The final boondocking location
Boondocking is a lot harder in this area. We stayed at a Wal-Mart, but I am going to list some camping places I found while researching. I have not stayed at these locations so I cannot confirm if they will be a good fit for you.
Coyote Lake - Harvey Bear Ranch Park in Gilroy, CA. 5 Stars on Campendium. 73 RV and tent camp spots.
Park Hours: 8am to sunset
Cost: $6 park entry fee
Camping costs: $34 for tents, $18 walk in tent spots, RV $44. 25% camping discount from November 1 to Feb 28/29.
Amenities: All spots have paved sites, picnic table, grill, fire pit, food storage lockers. RV sites have water and electricity. Dump is near by. Hot showers are available to all campers. Visitor center also.
Coyote Lake: allows for boating, waterskiing, kayaking, canoeing, jet skis, sailing, fishing and picnic area. No swimming is allowed.
Drive from San Francisco: 1 hour 49 minutes
OR
Mt. Madonna County Park in Watsonville, CA. 5 stars on Campendium. 78 camp sites.
Park hours: 8am to sunset. Gates lock at sunset. If camping, you must be there before 10pm.
Cost: $44 for RV, $34 for tents.
Amenities: sites are crushed gravel, fire pits, grill, picnic table, water available every 3-5 campsites, some sites have food locker storage. 14 miles of hiking trails, Visitor Center.
Pets: 2 allowed per site
Drive from San Francisco: 1 hour 47 minutes
This is an excellent travel itinerary that will allow for the exploration of 5 different national parks, an amusement park, a trip to Las Vegas, and so many places in between. This is an extensive list that allows for spontaneity and deviation if desired or you can follow it exactly as written for the perfect guided trip. I know you will enjoy navigating this path as much as we enjoyed each of these stops and I know you will to.
If you prefer to keep exploring here are a few more options in California to explore from San Francisco:
5 hours 6 minutes to Redwood National and State Park
3 hours 43 minutes to Lassen Volcanic National Park
3 hours 35 minutes to Lake Tahoe in Nevada
3 hours 51 minutes to Yosemite National Park
I hope you find this list helpful, and I am happy to answer any questions you have regarding this itinerary or any other fast-travel long distance questions you may have. Feel free to comment below or email me and don’t forget to Bookmark this page to reference later when you start planning your next vacation.
This trip can be taken at a quick pace within a month’s time, or you can spread this out over a couple months if you have the time to travel slow. There are so many different National Parks and scenic views you get to see within this trip. You will have so many memories and stories to tell along the way. I hope you have enjoyed this travel itinerary and find it useful.
Enjoy your journey,
Meet the author: Jennifer
I am a girl who loves to travel and enjoys sharing expert family travel advice. I am a content creator and influencer on Instagram with years of travel experience and provide readers with advice, tips, and details on adventurous family travel and tips on saving money while boondocking or traveling across the US.











Nassau is a bustling cruise port and a popular destination when traveling in the Bahamas on shorter cruises from Florida. This port offers everything from mouthwatering local cuisine to stunning white-sand beaches and rich Bahamian heritage.